¶ Introduction
This tutorial shows the integration of the product Advanced Locomotion System V4 by LongmireLocomotion.
This integration tutorial for was already part of Character Editor V4 Animation Update in May, 2021 (Unreal Engine 4.24) and now, some instructions have been updated to show the new nodes from Character Editor V6 Replication Update, thus you will see mixed set of Unreal Engine Editor UI. The rest of the tutorial should be working as the ALS V4 was discontinued at the time of our update release. If ALS V4 is continued again, we cannot garantee that all steps in this tutorial are working correct.
This is a basic setup of how to integrate ALS V4 into our Character Editor. This integration is far from perfect as we did not develop ALS V4 and do not know all its details, but hopefully this is a start for you.
After completing this tutorial, you will have our BP_Character with a basic setup for using the same animation system of ALS V4. We also provide you some first steps into “advanced” topics like the ALS mantle system or our morph system. For more, it is up to you to dig deeper into ALS – especially ALS_Base_CharacterBP, ALS_AnimMan_CharacterBP, and ALS_AnimBP may help you.
¶ Video Tutorial
If you prefer a video, go ahead. The content may vary, so read the text tutorial, if anything is unclear.
[YouTube N9UqSMQISpo]
¶ Basic
All following chapters refer to our female character.
¶ Adjust our Skeleton
[V4] If you have our Character Editor V4, then you will already have these virtual bones set up by us. Skip to next chapter – Retarget the ALS AnimBlueprint. If not, read on.
[V6] If you have our Character Editor V6, then you can use the ALS_Mannequin_Skeleton and ALS_AnimBP instead of our assets. You need to assign the skeleton to our skeletal meshes. Then skip to chapter Adjust our BP_Character. If not, read on.
Open SKEL_fe_polyphoria and look to the Skeleton Tree.
You need to add several virtual bones matching the right picture. To achieve this, right click on a bone as the first connection point -> Add Virtual Bone -> Pick Target Bone… by typing a name and select it in the list below.
We will show you the steps for the first Virtual Bone LHS_ik_hand_gun which starts at hand_l and goes to hand_r. Thus, right click on the bone hand_l -> Add Virtual Bone -> search for hand_r and select it.
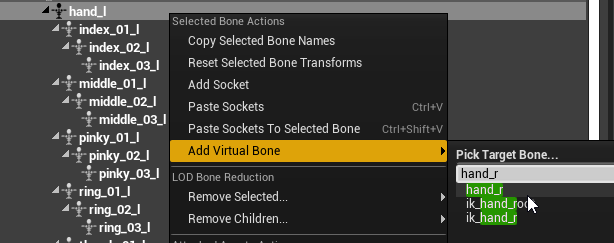
Now you will find a blueish bone next to all the finger bones called VB hand_l_hand_r. To let it recognize by ALS V4, rename the hand_l_hand_r part to "LHS_ik_hand_gun".

Follow the same process for all these pairs in the given order. As you may notice, sometimes First Bone and Target Bone are identical. That is okay. Also left hand (1, 2) and right hand (3, 4) are reversed when it comes to create their respective handgun virtual bone.
| First Bone | Target Bone | Rename to | |
| 1 | hand_l | hand_r | LHS_ik_hand_gun |
| 2 | LHS_ik_hand_gun | hand_r | LHS_ik_hand_r |
| 3 | hand_r | hand_r | RHS_ik_hand_gun |
| 4 | RHS_ik_hand_gun | hand_l | RHS_ik_hand_l |
| 5 | ik_foot_l | ik_foot_l | ik_foot_l_Offset |
| 6 | ik_foot_l | calf_l | ik_knee_target_l |
| 7 | ik_foot_r | ik_foot_r | ik_foot_r_Offset |
| 8 | ik_foot_r | calf_r | ik_knee_target_r |
| 9 | ik_foot_root | foot_l | foot_target_l |
| 10 | ik_foot_root | foot_r | foot_target_r |
| 11 | Root | Root | Curves |

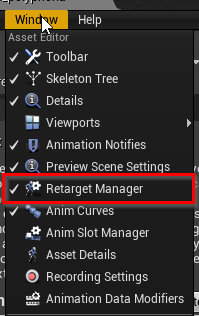
After completing this you need to make sure that the skeleton is prepared for the same humanoid rig, that ALS is using. In the skeletal editor you have still open go to Window > Retarget Manager.
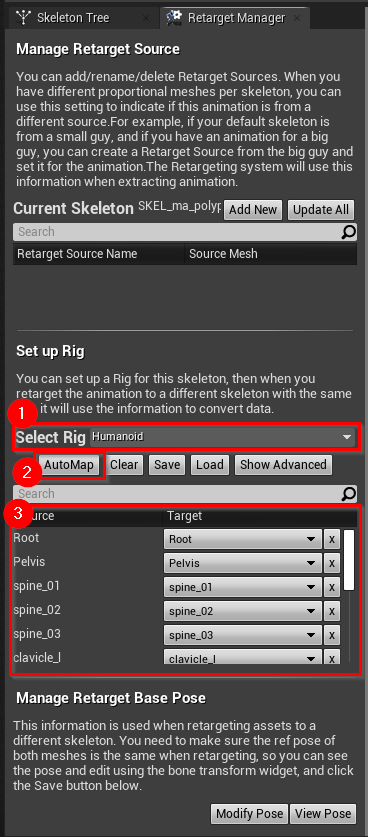
- Select the Humanoid Rig in the dropdown.
- AutoMap the skeleton
- Double check that all Sources are mapped to a Target (usually the same name, probably with some letters lowercase or uppercase).
- Save the skeleton.
¶ Retarget the ALS AnimBlueprint
With the skeleton set up, you can now retarget the ALS AnimBlueprint to our skeleton.
Right click the original ALS_AnimBP in the AdvancedLocomotionV4 folder > Retarget Anim Blueprints > Duplicate Anim Blueprint and Retarget.

The Select Skeleton window opens. Select SKEL_fe_polyphoria in the left panel (1) and choose a new folder for the retarget assets (2). The latter is recommended, because all the 122 Animation Sequences and Blend Spaces get retargeted as well along the AnimBlueprint itself. Then just retarget (3). This may take several minutes to retarget each asset.
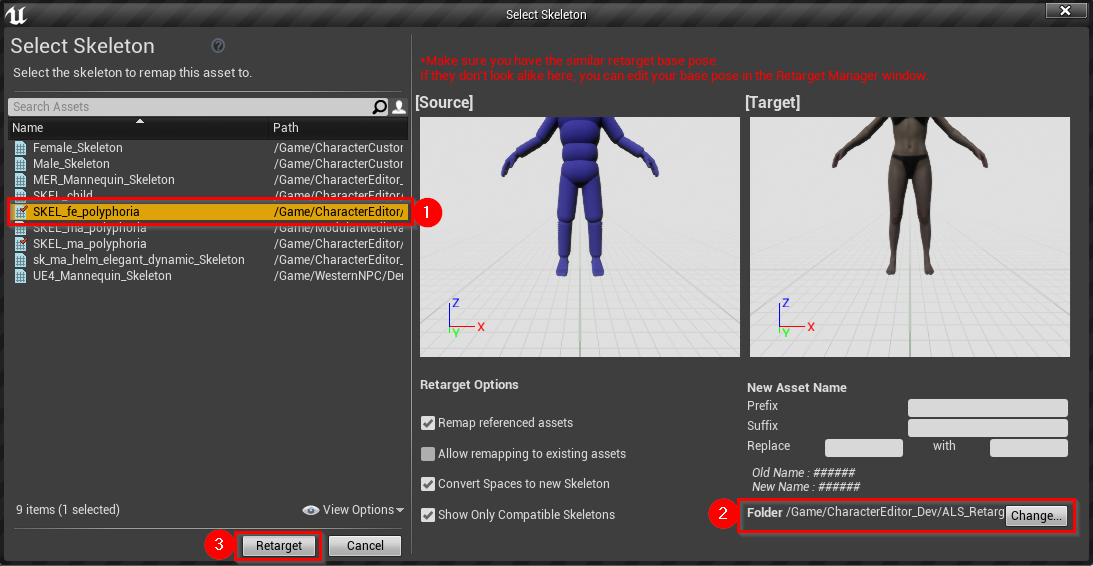
Once completed there is the new ALS_AnimBP right in your chosen folder.
¶ Adjust our BP_Character
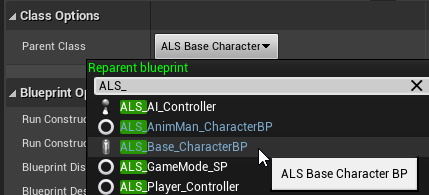
Open our BP_Character from the Character Editor Base folder and open its class settings. Then change the Parent Class to ALS_Base_CharacterBP.
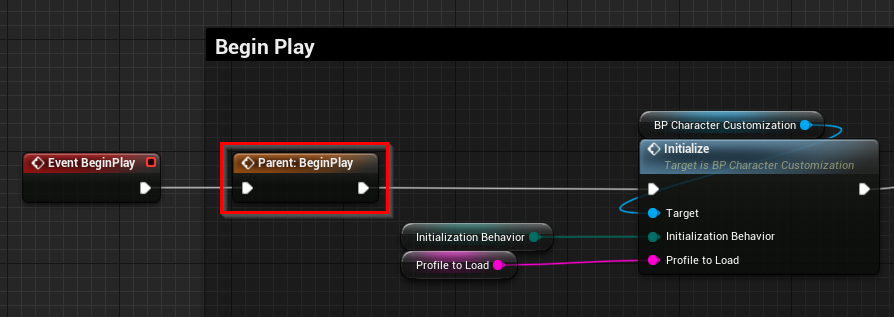
[V4] Since the Animation Update, open the Event Graph of the character and place a Parent: Begin Play node between Event Begin Play and the Initialize function.
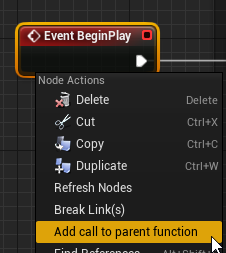
[V6] Since the Replication Update, place the created Parent: Begin Play node between Event Begin Play and the Initialize from Character Begin Play function.
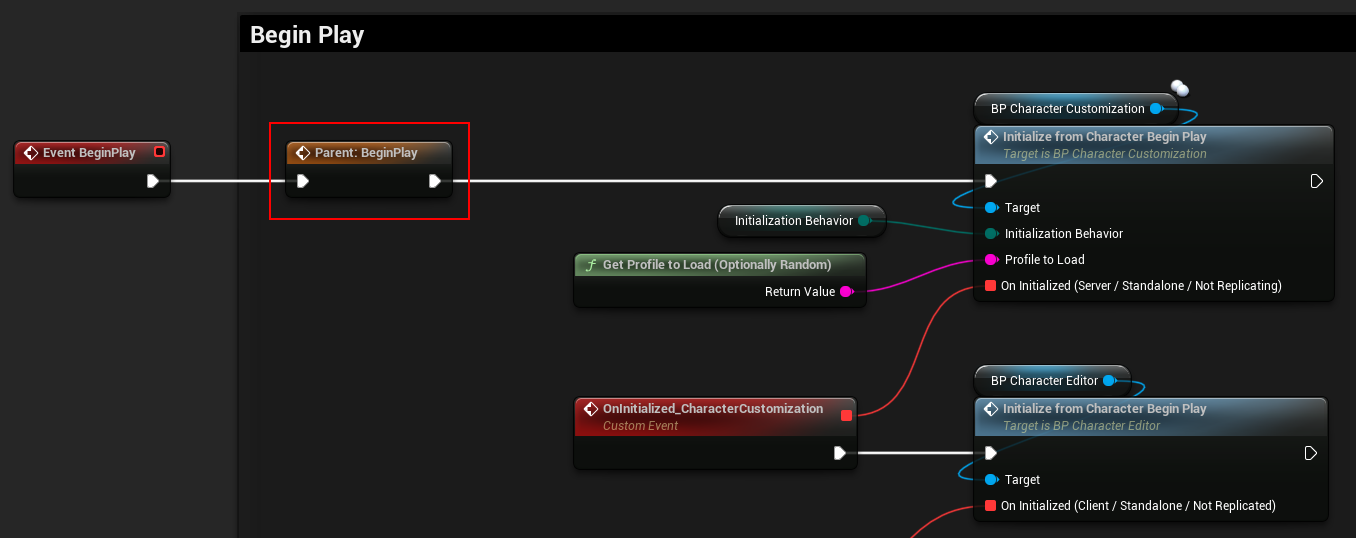
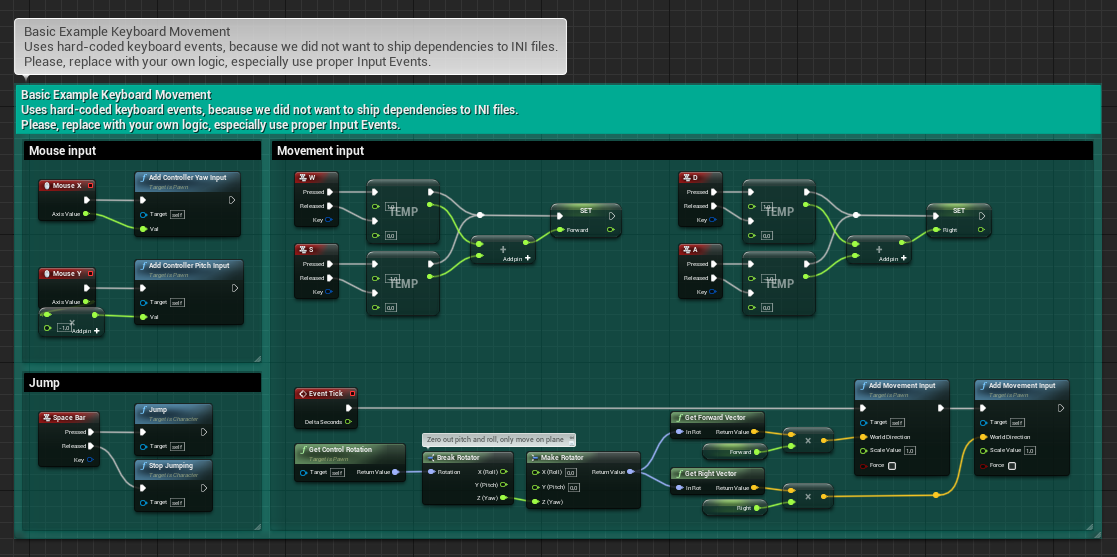
Staying in Event Graph, remove all our “Basic Example Keyboard Movement” nodes as they would conflict with the ALS inputs.
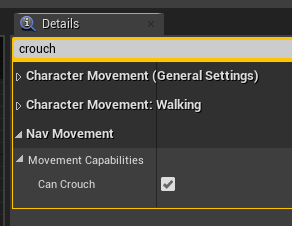
Enable crouching by selecting the Character Movement component and tick “Can Crouch” in its details.

¶ Adjust our DT_AnatomyProfiles
[V4] Open our DT_AnatomyProfiles data table and select the row HumanFemaleAdult (or the corresponding rows that use the male or child skeletons).
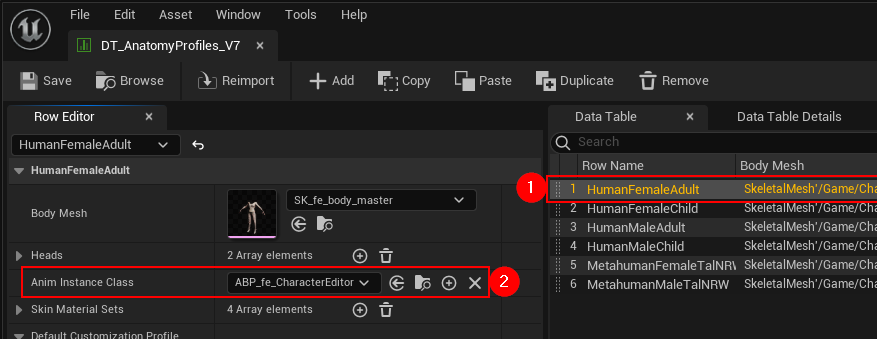
Change the Anim Instance Class to the ALS_AnimBP, you have just retargeted.
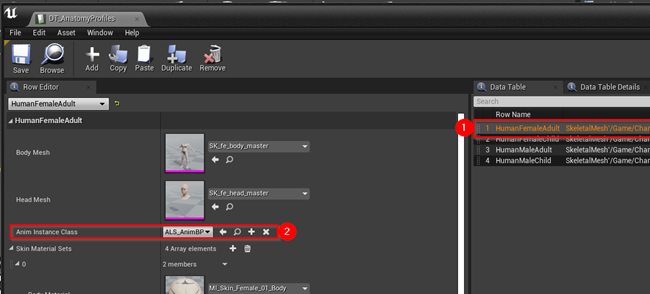
[V6] Here it looks similar as above.
¶ Prepare the ALS level for testing
Open the ALS_DemoLevel.
Remove the ALS_AnimMan_CharacterBP (on the left) from the level. Optionally place a generic PlayerStart.
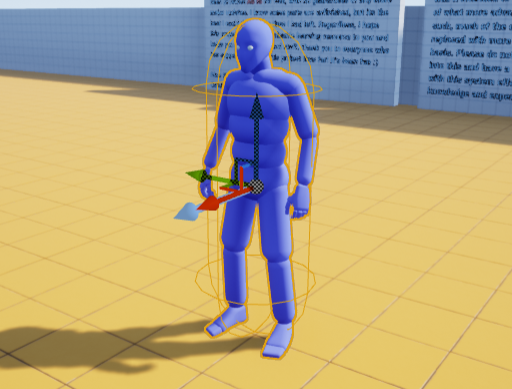
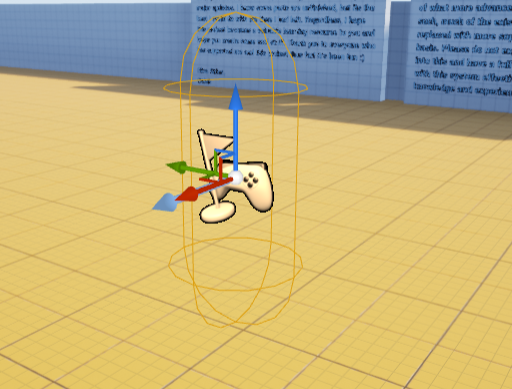
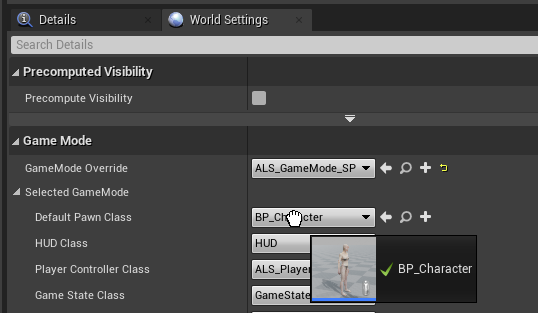
In the World Settings of the level select our BP_Character as Default Pawn Class.
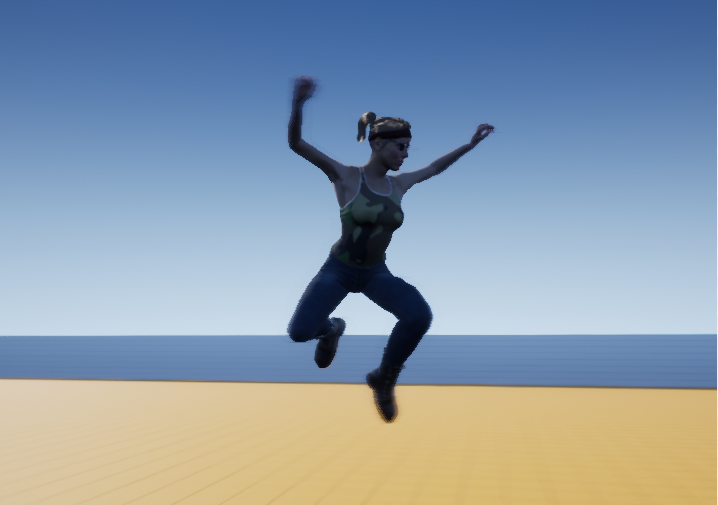
Press “Play in Editor” and jump around as you never did before!
And of course, use the Character Editor!
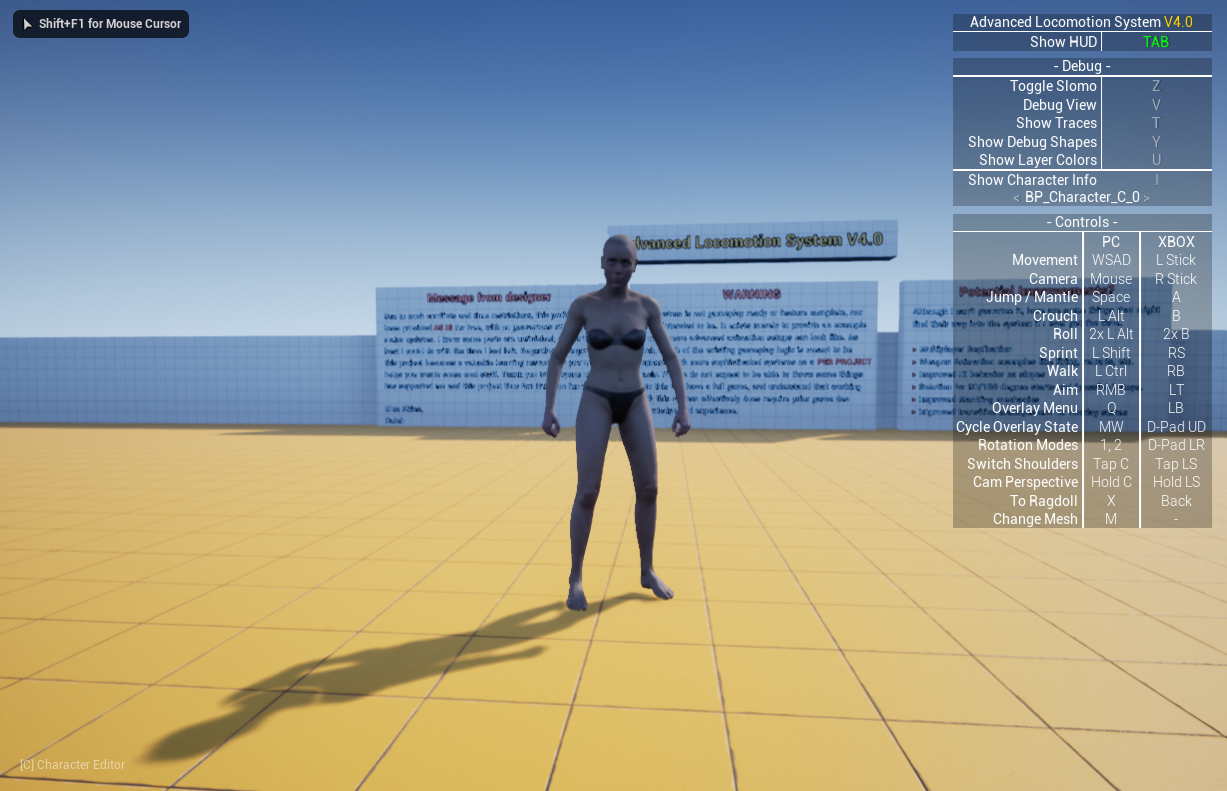
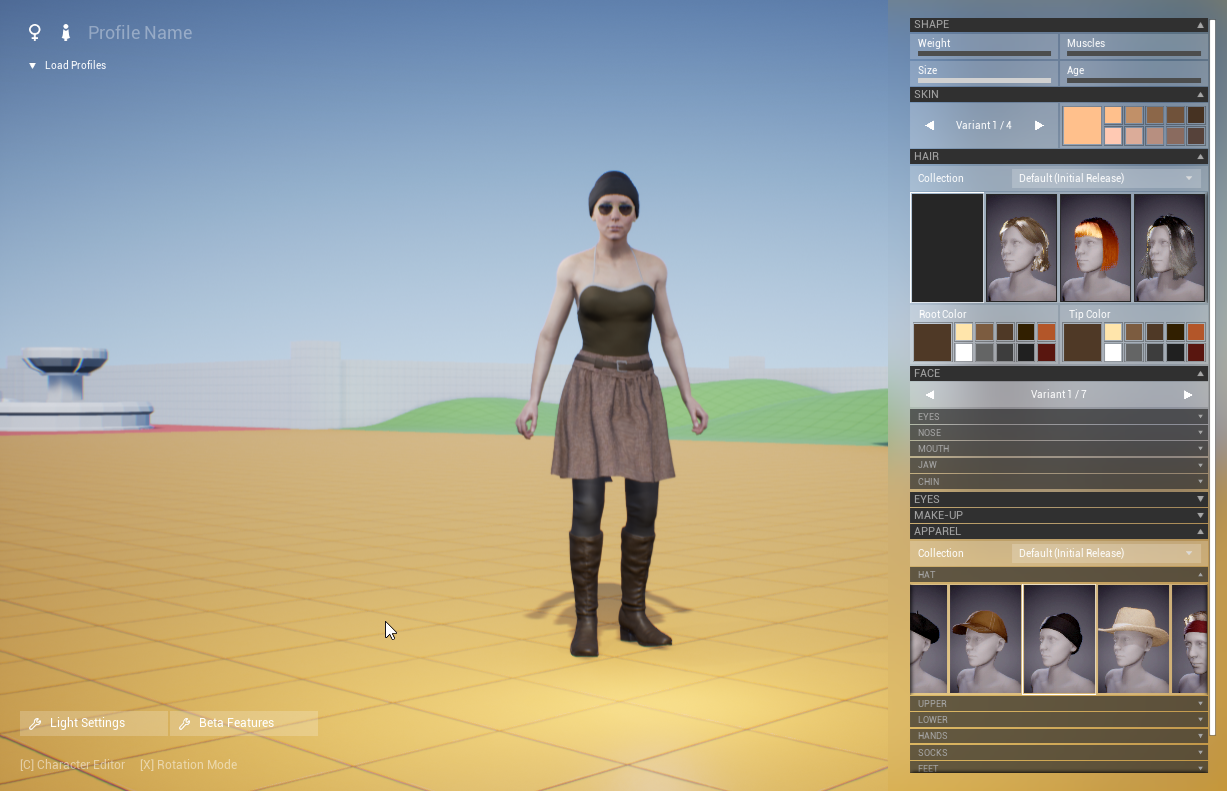
¶ Advanced
¶ Our Morph System
If your character should also use foot, size and age transforms, there are additional steps to perform.
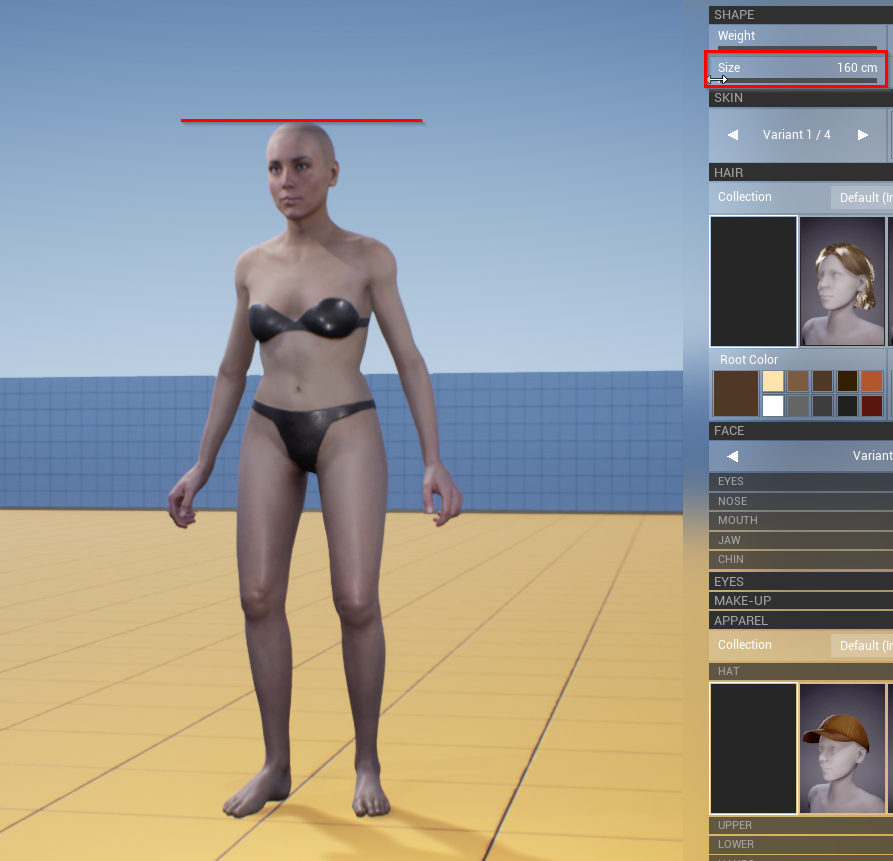
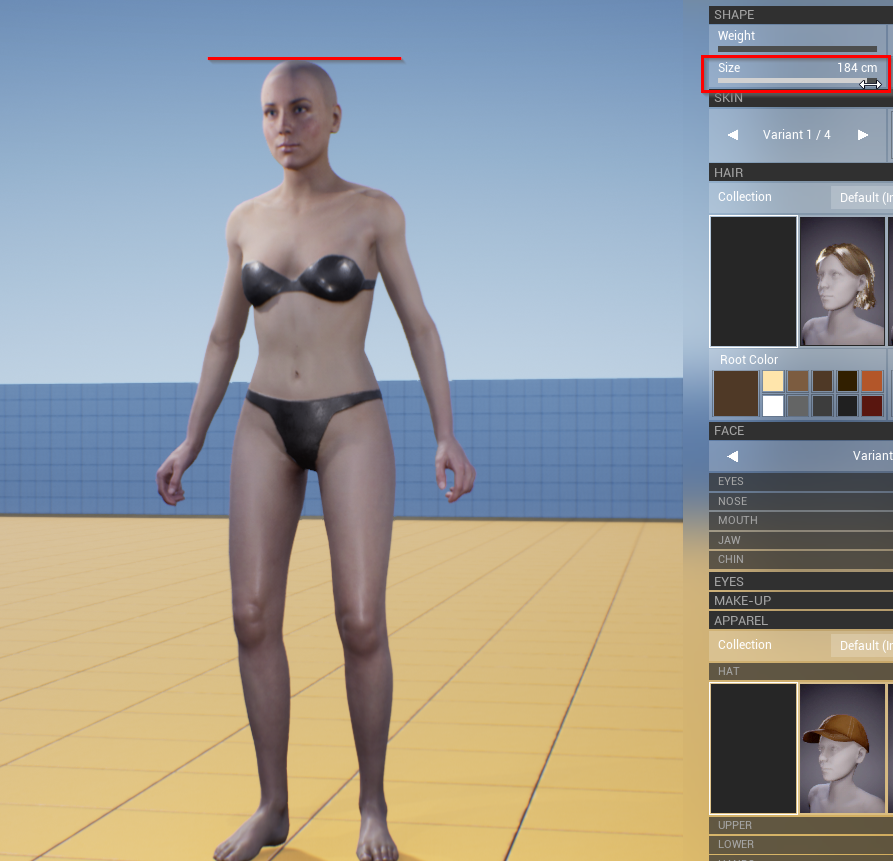
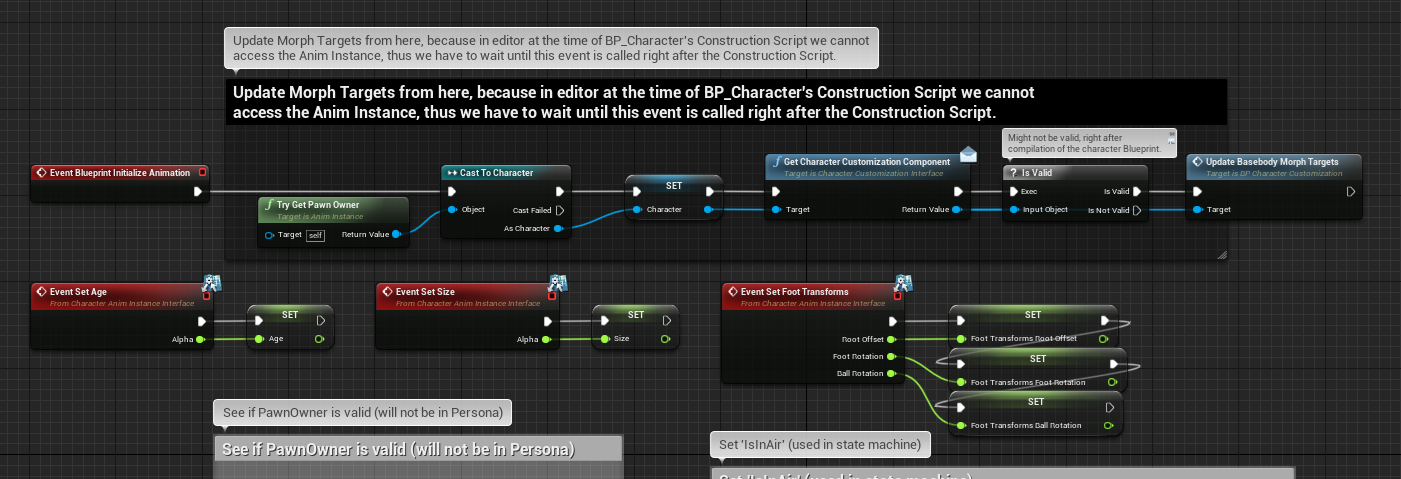
The whole ALS movement relies on the ALS_AnimBP that you have retargeted and used in the previous chapters. Therefore, none of our logic is attached to it by default as it belongs to a completely different AnimBlueprint. Look at our ABP_fe_CharacterEditor AnimBlueprint’s EventGraph and AnimGraph for things you may want to copy. This chapter will explain how to copy the size transforms.
Event Graph
Anim Graph

Open the ABP_fe_CharacterEditor Anim Graph (which you also see on the previous page) and copy all content in the Size Transform comment.
Open your retargeted female ALS_AnimBP and place all the copied nodes (red box) into its AnimGraph. Connect our initial Transform (Modify) Bone node to the Two Bone IK node (1) and our last Transform (Modify) Bone node to the Component To Local node of the pink comment (2). You may figure out a better place to connect them for organization purposes but this place was a perfect fit for testing this.
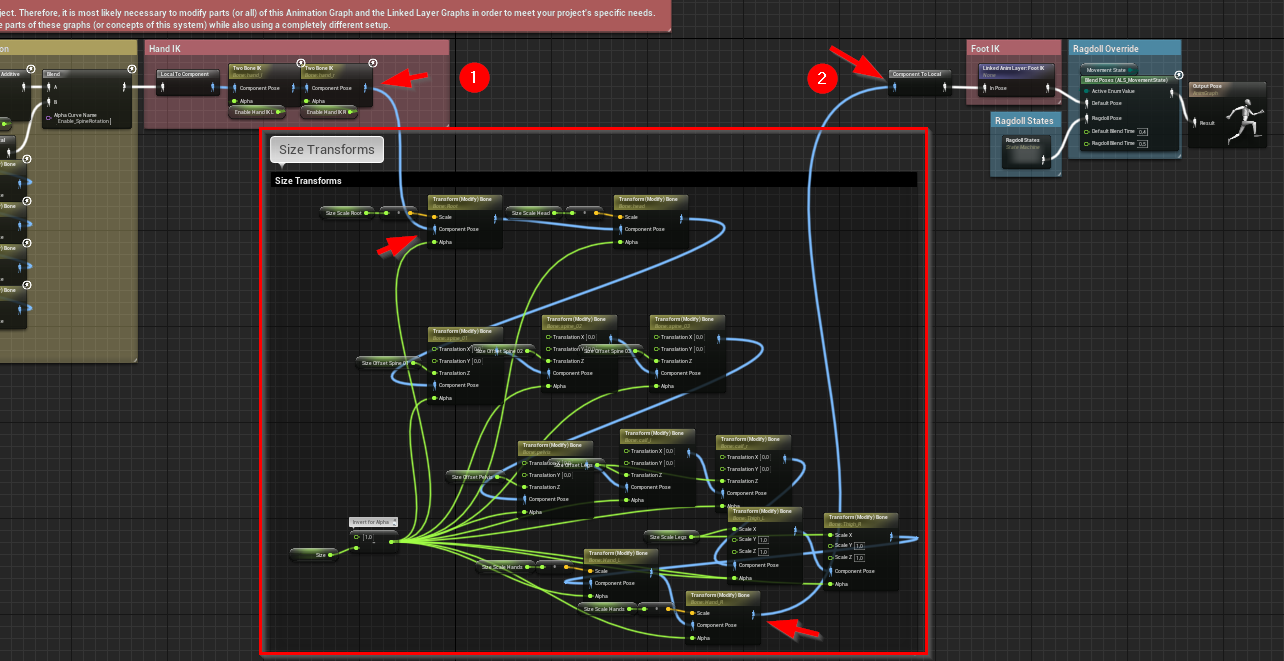
You may now have noticed several gray variables after placing the nodes. (Don’t be confused: The image above is captured with the following steps already performed. Look at the image below.) Compile the Blueprint to see errors popping up at their positions to better identify them. We will fix them in the next step.
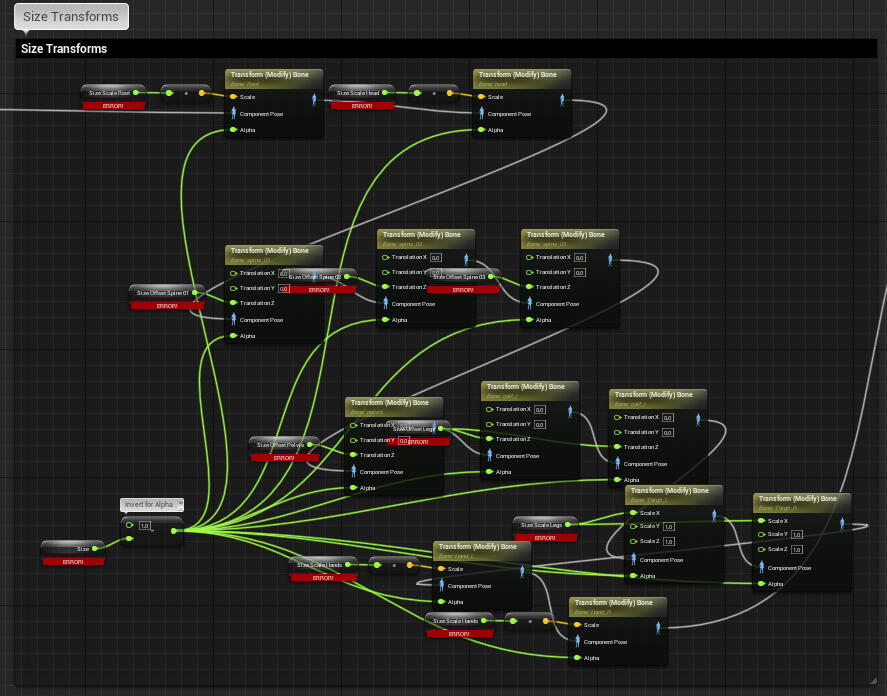
Simply right click on each gray variable and create a new variable from the context menu. This way the naming and type of the variable is the same of the variable from the original source ABP_fe_CharacterEditor. After doing this the variable gets its color back.


Repeat this process for each variable. The errors will be gone after you compile again.
In the My Blueprint tab there should now be all these variables.
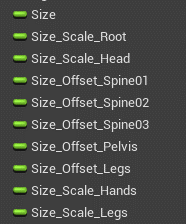
Look at the Anim Preview Editor and change it to the “Edit Defaults” mode. Apply all these following values to your created variables. Be careful, as the order of the input fields may be different, if you have created the variables in a different order.
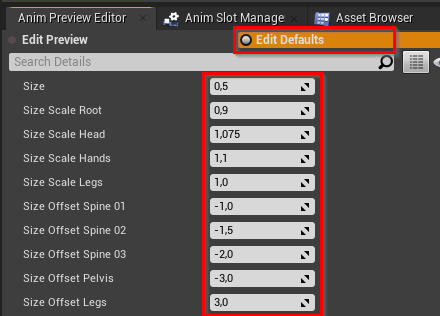
If you need foot or age transforms as well, look at the corresponding values in ABP_fe_CharacterEditor.
Once completed your are almost there.
Go to the AnimBlueprint’s class settings and add the CharacterAnimInstanceInterface (not CharacterCustomizationInterface!)

Go back to ABP_fe_CharacterEditor Event Graph and copy the Event Set Size nodes to your ALS_AnimBP Event Graph.

Also from ABP_fe_CharacterEditor copy the last three nodes from the Event Blueprint Initialize Animation.

Back in your ALS_AnimBP Event Graph, arrange the nodes and connect the three stray nodes to the Set Character node like seen below. This way our Character Customization component can communicate with the AnimBlueprint.
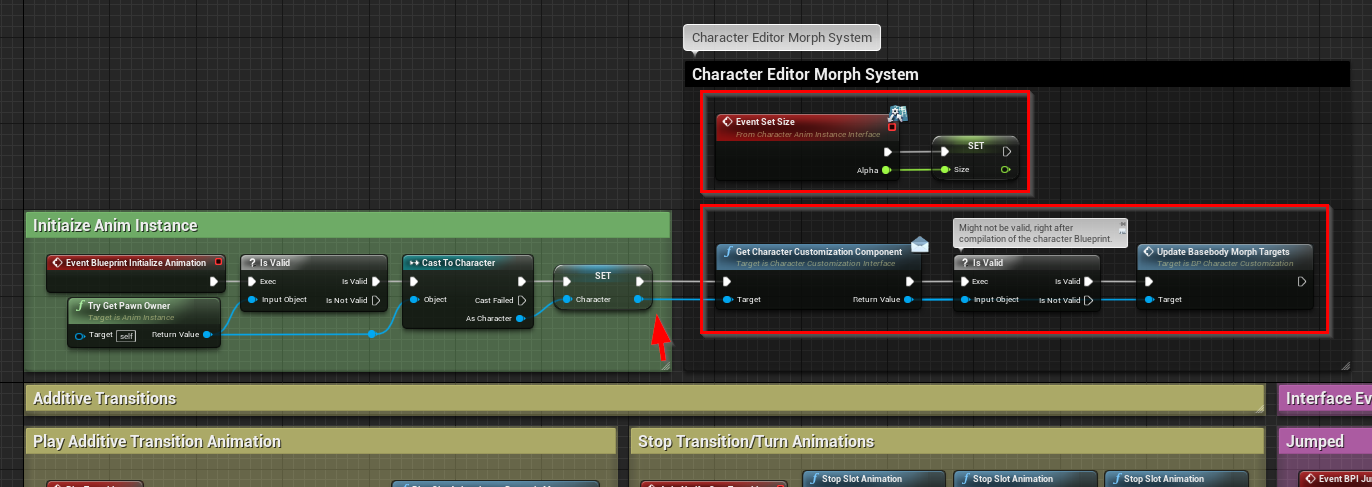
Now again, press “Play in Editor” and change the size of your character.
¶ ALS Mantle & Roll Movement
If your character should also climb and roll, there are additional steps to perform. As you can see, we also tested the male character, but feel free to go on with your female setup.
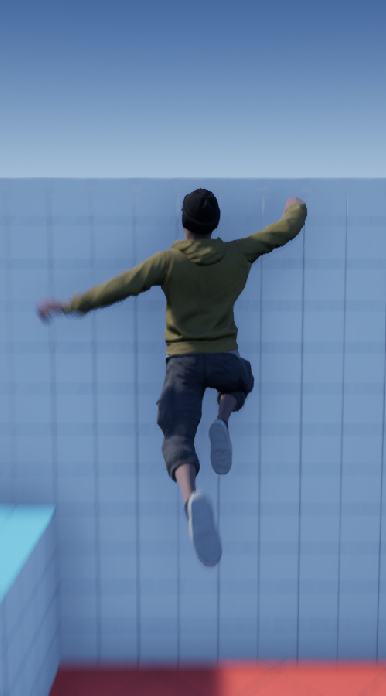
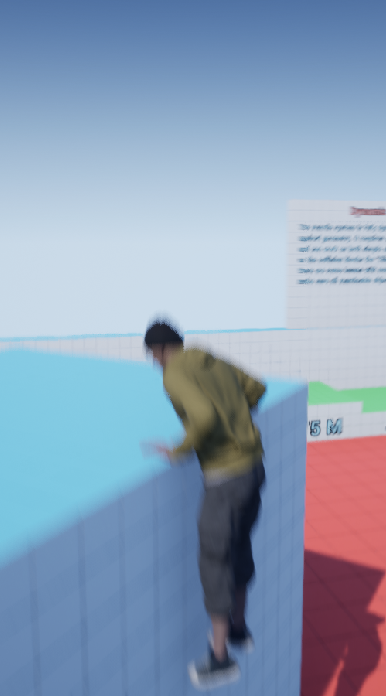
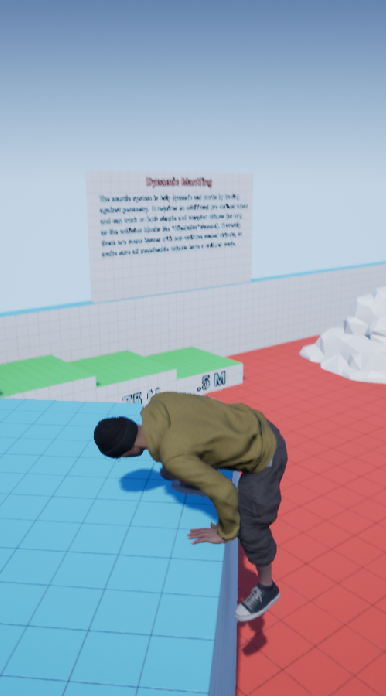
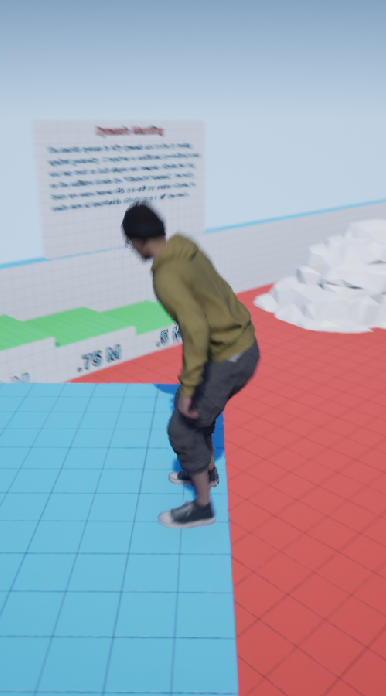
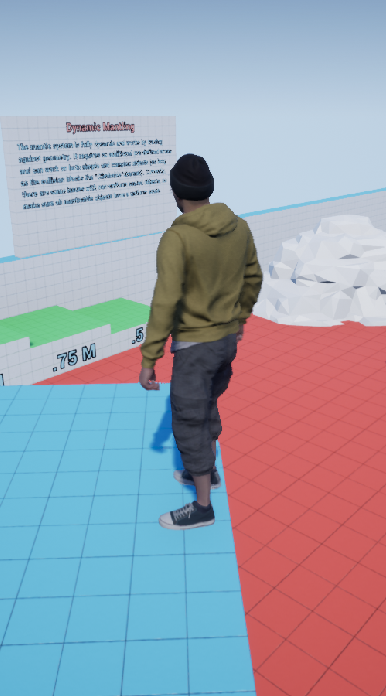
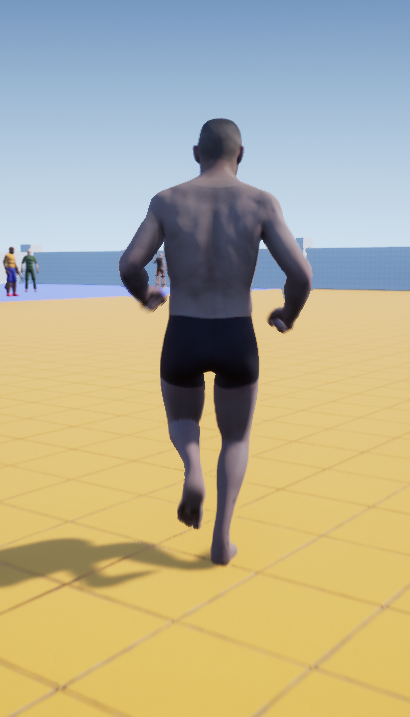
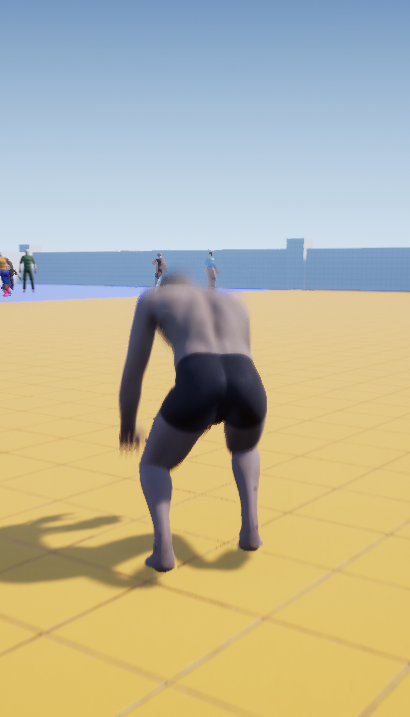
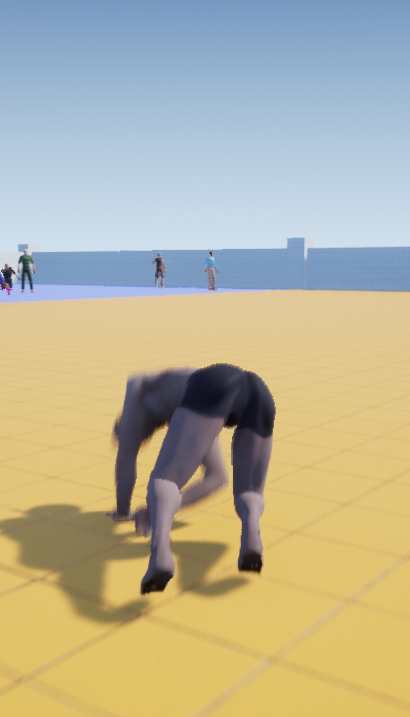
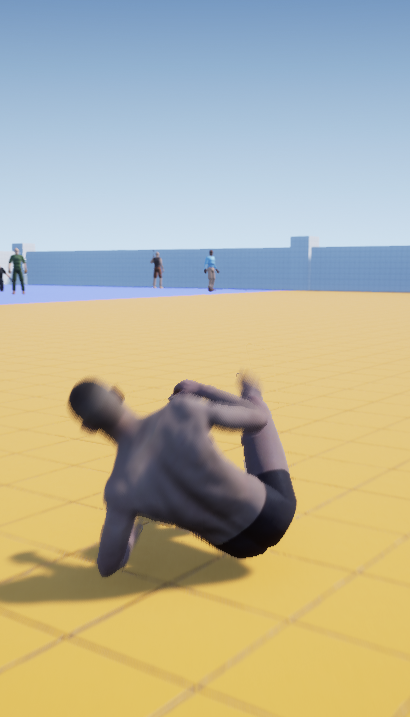
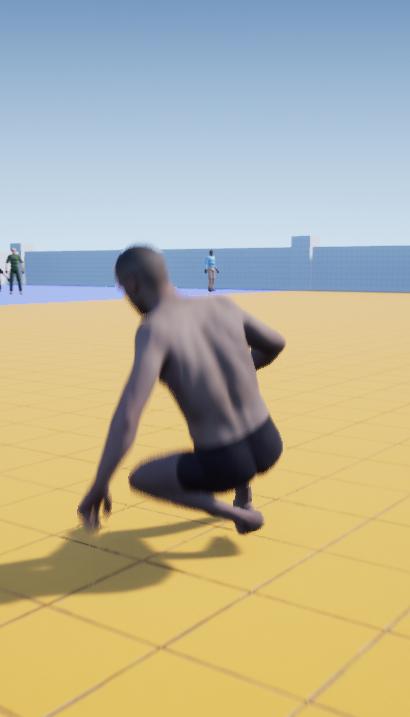
We treat this chapter not as “basic”, because the animations did not get retargeted straight away with the
ALS_AnimBPretargeting and work slightly more technically/dynamically and may require very custom implementation details if you desire.We also did not mix it into the “basic” chapters, because for tutorial purposes (and because we cannot deliver all these ALS-retargeted assets to you) we will work with separate variables instead with our
DT_AnatomyProfilesdata table.This slightly causes “incompleteness”, because only the skeleton, that you have retargeted the upcoming animation montages of the next pages to, will work with these montages (e.g., if you have retargeted them to
SKEL_fe_polyphoria, they will only work with the female meshes as they rely on that skeleton).We suggest, if you want to support more than one anatomy, that you extend on your own the
FAnatomyProfilestructure, which makes up the row entries ofDT_AnatomyProfilesand insert an array or a map of these mantle asset structures that you will have prepared in several minutes. This way you could fill the so calledGetDataAssetandGetRollAnimationfunctions right from the current Anatomy Profile of your character.But please, keep on reading.
We will now cover the three default animation types:
- Mantle 1m Default for smaller heights and
- Mantle 2m Default for greater heights
- Land Roll Default for rolling
The mantle information must be delivered by the GetMantleAsset function of the ALS_Base_CharacterBP.
The roll information on the other hand by the GetRollAnimation function.
Like you did before for the ALS_AnimBP, retarget the ALS_N_Mantle_1m_Montage_Default, ALS_N_Mantle_2m_Montage_Default and ALS_N_LandRoll_F_Montage_Default animation montages to our female, male or child skeleton to the respective folders next to their AnimBlueprints.


Open our BP_Character and head to My Blueprint > Functions. Hover over the “Functions” category and then click the Override button. Select the functions GetMantleAsset and GetRollAnimation to override them. You can also type their readable names Get Ma… or Get Roll … to search in that list.
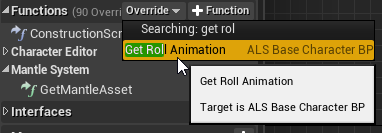
Open the GetMantleAsset function override and place the following nodes.
- Remove the parent call node that might be there, leaving only the input and return node.
- Grab a wire from Mantle Type input and place a “Switch on MantleType” node.
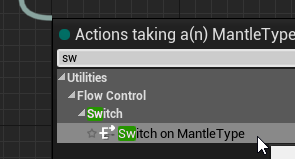
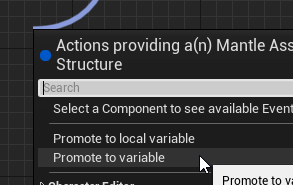
- Grab a wire from Return Value output and promote it to a new variable. Repeat this another time and call both variables
Mantle_2m_DefaultandMantle_1m_Default.
- Duplicate the Return Node and connect all nodes like this.
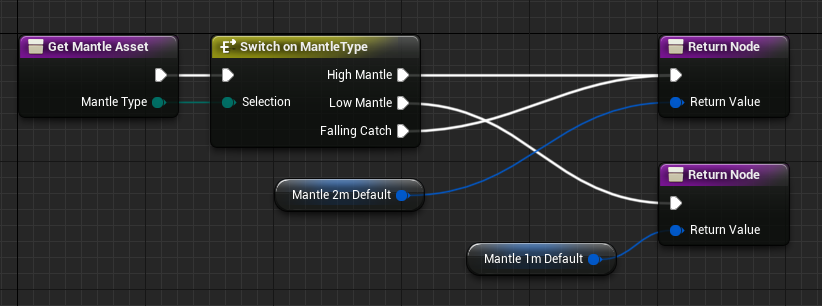
Open the GetRollAnimation function and do the same for a variable called LandRoll_Default.

Open ALS_AnimMan_CharacterBP.
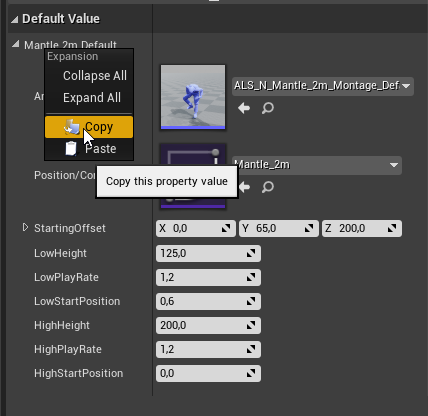
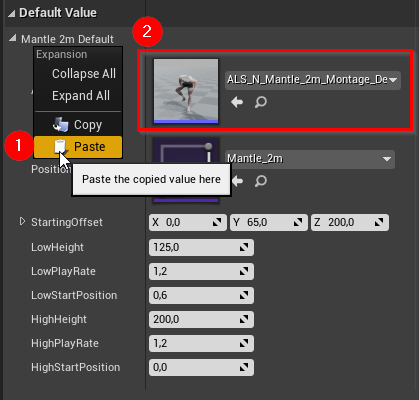
In My Blueprint > Variables, search for the same names of the variables that you have just created – AnimMan has them, too! To make it easier for you, simply copy their whole property values (left) and paste them into your variables inside the BP_Character (right, 1). The assign the corresponding retargeted animation montage to the AnimMontage field (2).
Also, assign your retargeted roll animation montage to the LandRoll_Default variable.

And now, you can finally press “Play in Editor” and roll and climb around as you never did before!
Keep an eye on the Unreal Engine Output Log if something seems wrong. Maybe an animation does not play, because it is retargeted to the wrong skeleton, that does not match your current anatomy.
¶ General Caveats
¶ Switch Shoulders functionality
ALS V4 uses the hotkey “C” which conflicts with our Character Editor opening. As you open the editor you will also trigger the ALS “Switch Shoulders” functionality, which in turn, as you close the editor again switches the ALS camera behavior. Closing our editor does not trigger that functionality again, therefore it is activated.
By default, if you rotate the camera around the ALS character, its head is following your camera direction and the character is eventually turning itself completely to take a more comfortable pose, if the head would turn too far. But if you “switch shoulders” it is usually intended to be a first-person mode, where the character turns more directly to your camera direction resulting in small footsteps, which is not supported by our character as it stays in third-person mode – thus the animation seems a bit choppy and unwanted (see next chapter, “Smooth Transitions”).
In case you see this “choppy” behavior it is due to the opening of the character editor. Just use another hotkey for either the character editor or “Switch Shoulders”.
¶ Character Editor camera rotation
By default, while in Character Editor you can rotate the character by left and right mouse dragging. Due to the ALS V4 auto alignment of the character (as described in the caveat above), your character would adjust itself to the camera and you are kind of not able to change the camera rotation. We suggest that you switch the camera rotation mode with hotkey “X” and turn the camera around the character instead of rotating the character itself.
¶ What is not in this tutorial?
¶ Ragdoll
Currently, our assets are not properly set up to support ragdoll physics.
¶ Smooth Transitions
Currently, the AnimMan of ALS has several nice camera montages and transitions for movement changes between walking and crouching, rolling, or climbing. Our setup may look a little bit choppy but investigate ALS_AnimMan_CharacterBP and copy the functionality you desire.
¶ Switching between anatomies in-game
Currently, if you change the anatomy via the editor in-game something stops several parts of ALS from working. E.g., the automatic turning of the character gets caught in an endless loop of not fully turning while resetting. We could not yet figure out, what is causing this. For now, you should start your character with the correct anatomy assigned.