We know that the process of capturing thumbnails is manual and repetitive due to technical limitations of Unreal’s non-beta features. We do not know if we will improve it in the future. But for now, go ahead and have fun!
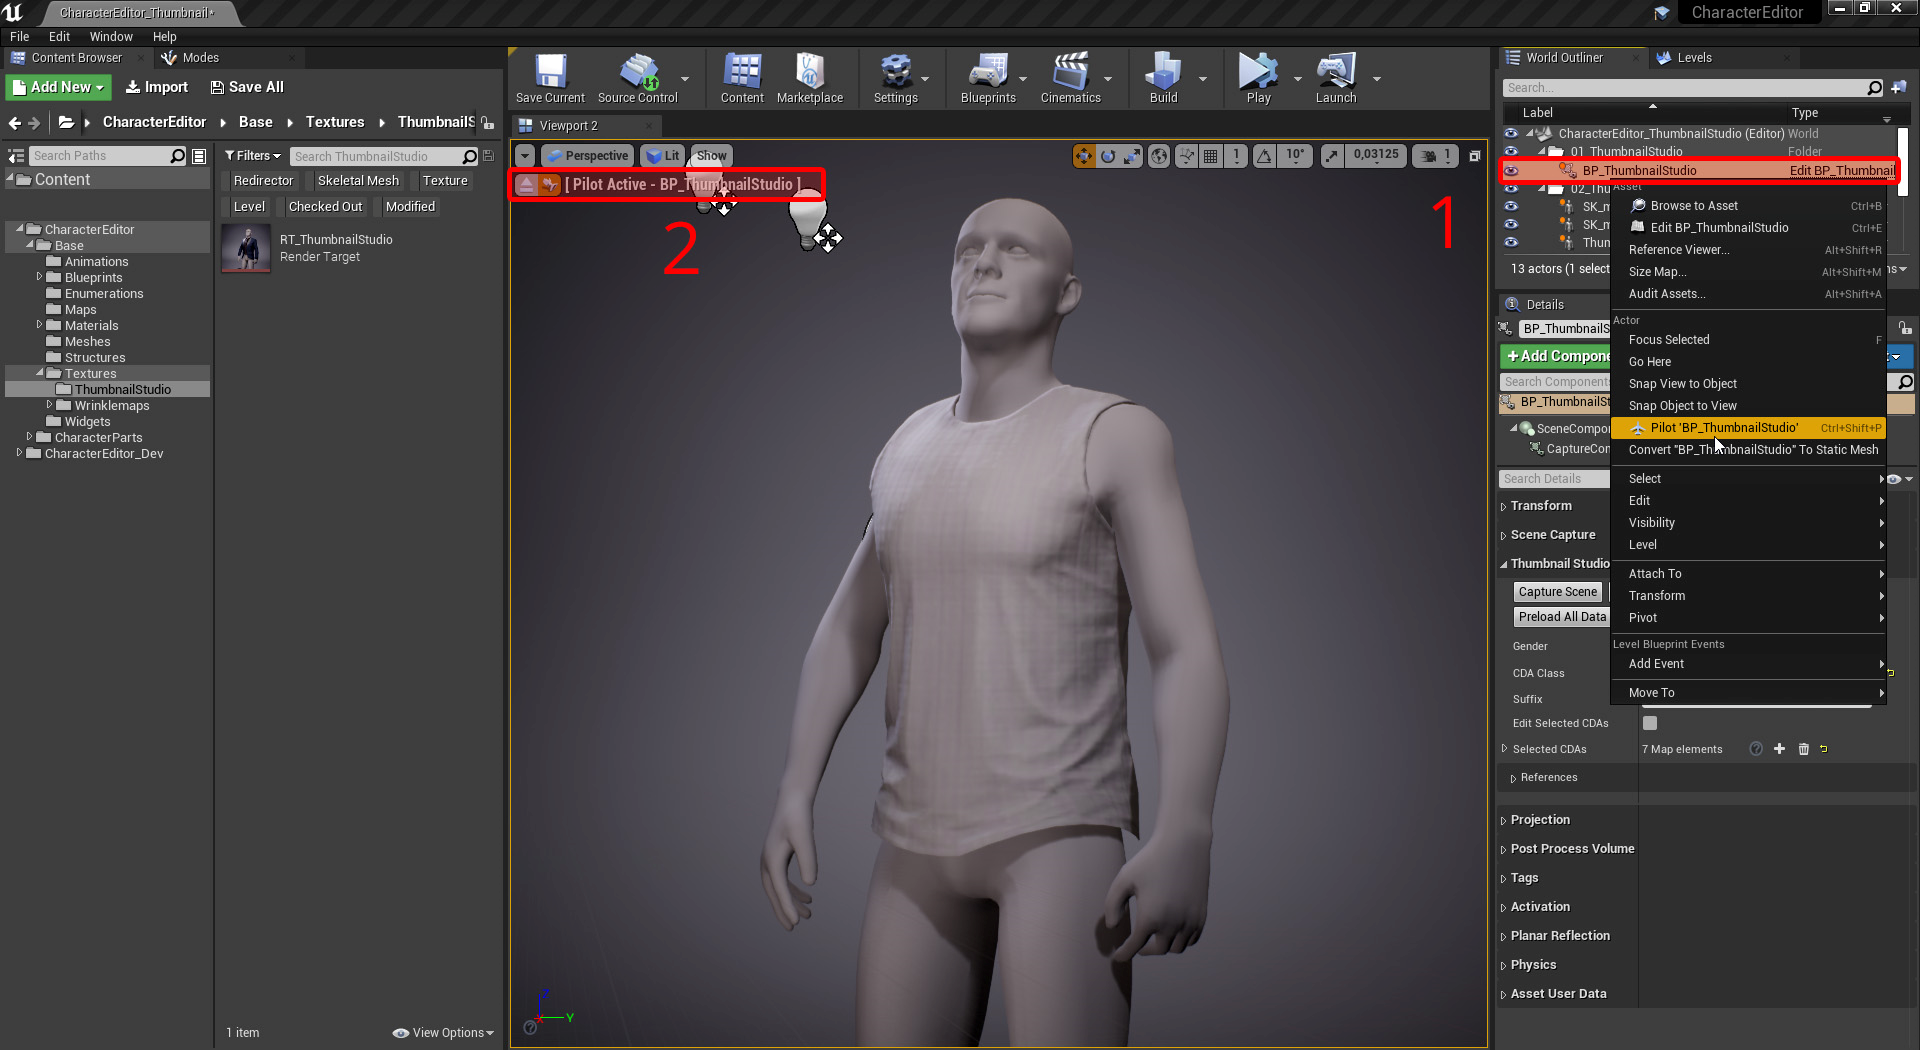
To capture thumbnails for new CDAs we have a level prepared for you. We will setup the Unreal Editor to be like a little capturing studio for you. It will look like this, covering one and a half screen widths.
Open Maps/CharacterEditor_ThumbnailStudio to proceed.
¶ Prepare Viewport
- Go to World Outliner and right-click the BP_ThumbnailStudio > Pilot ‘BP_ThumbnailStudio’. It contains a scene render component. When moving you will adjust the position and angle of the thumbnail.
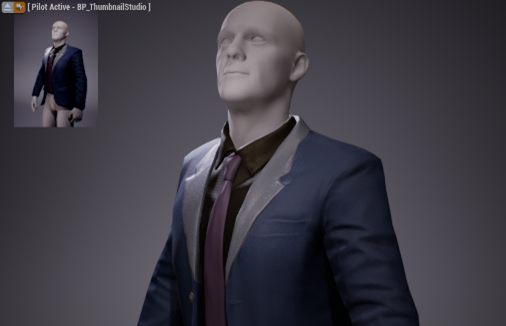
- Make sure the “pilot status” is visible.
- Open the Content Browser and find the render texture /CharacterEditor/Base/Textures/ThumbnailStudio/RT_Thumbnailstudio. Next to this texture your new thumbnails get generated. Important: Do never delete the render texture or things break up.

¶ BP_ThumbnailStudio

-
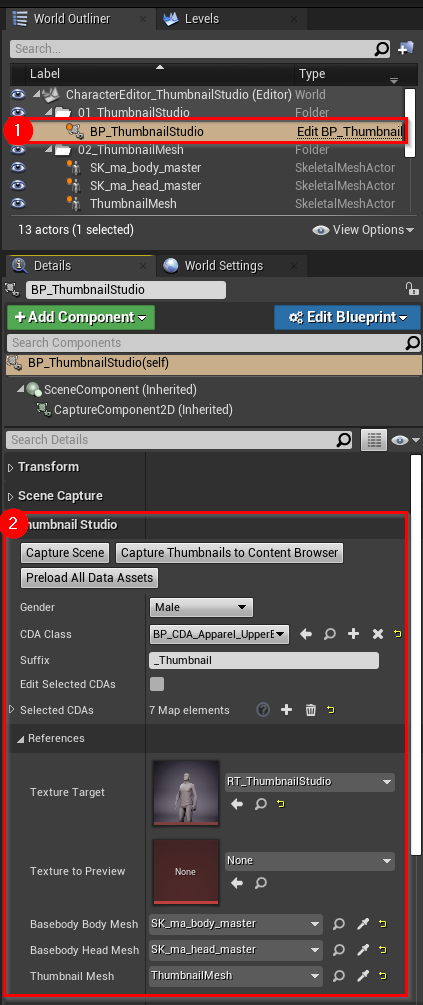
Select BP_ThumbnailStudio.
-
In Details Panel, search for the category “Thumbnail Studio”.
Here you find some settings and function buttons.
Starting at the bottom there are several references pointing to skeletal mesh actors and the Texture Target. Leave them unchanged.
More important for you are the main settings above.
The general idea is, that you capture batches of thumbnails for Customization Data Assets by default – our so called “Selected CDAs”.Gender and CDA Class updates the Selected CDAs array.
Suffix gets appended to the thumbnail asset name.
Edit Selected CDAs stops the update from Gender and CDA Class and allows you to add or remove entries to the Selected CDAs on your own, if you want to capture e.g., only a single asset. When adding your own assets to the array, we recommend not to mix genders or different apparel types, because all thumbnails are captured from the same position and angle – it would be a pity if you capture hats and shoes and do not even see one of them if the camera is at the wrong position.
At the very top there are three function buttons:
Capture Scene updates the Texture Target. The changes can be viewed under References or in Content Browser when hovering the render texture.
Capture Thumbnails to Content Browser does at it says.
Preload All Data Assets is handy if you want to capture lots of data assets after a fresh editor startup. Data Assets only get loaded from disk if they are referenced somewhere. Since this is not true for our assets unless you play in editor it might take a while capturing thumbnails, because they get loaded one after another. Pressing this button does the job directly for all assets and makes capturing faster.
¶ Capture Thumbnails
-
As you are piloting the BP_ThumbnailStudio, move in the viewport like you always do and adjust the camera position and angle. Hold the right mouse button after right-clicking into the viewport to move the camera with WASD. Use F to focus the mesh for faster movement. Make sure you do not left-click, since you would deselect the mesh in the World Outliner. Then press G to hide the outline around the mesh and other game objects that may be visible.
-
Occasionally press Capture Scene and hover over the Texture Target to approach a position you like to capture.
-
 Press Simulate in editor to see a cropped version of the thumbnail as it would be in the Character Editor.
-
 Press Capture Thumbnails to Content Browser in Details Panel.
The Thumbnail Studio will dress the character with each of the Selected CDAs one after another and captures a thumbnail automatically. To capture specific CDAs make the settings in the Details Panel.
The textures get generated next to the RT_ThumbnailStudio texture in the Content Browser. Due to technical limitations, they will first appear darker than expected – and unsaved. Saving the textures will compress them properly and make them bright as the render texture itself. Before saving, take a first glance and decide to delete the textures if they are not aligned correctly for all apparels.
Repeat 1-4 as necessary.
Before recapturing thumbnails delete the old ones since a number (1, 2, 3 etc.) gets appended automatically by the Content Browser and is nothing that we can fix, currently.
-
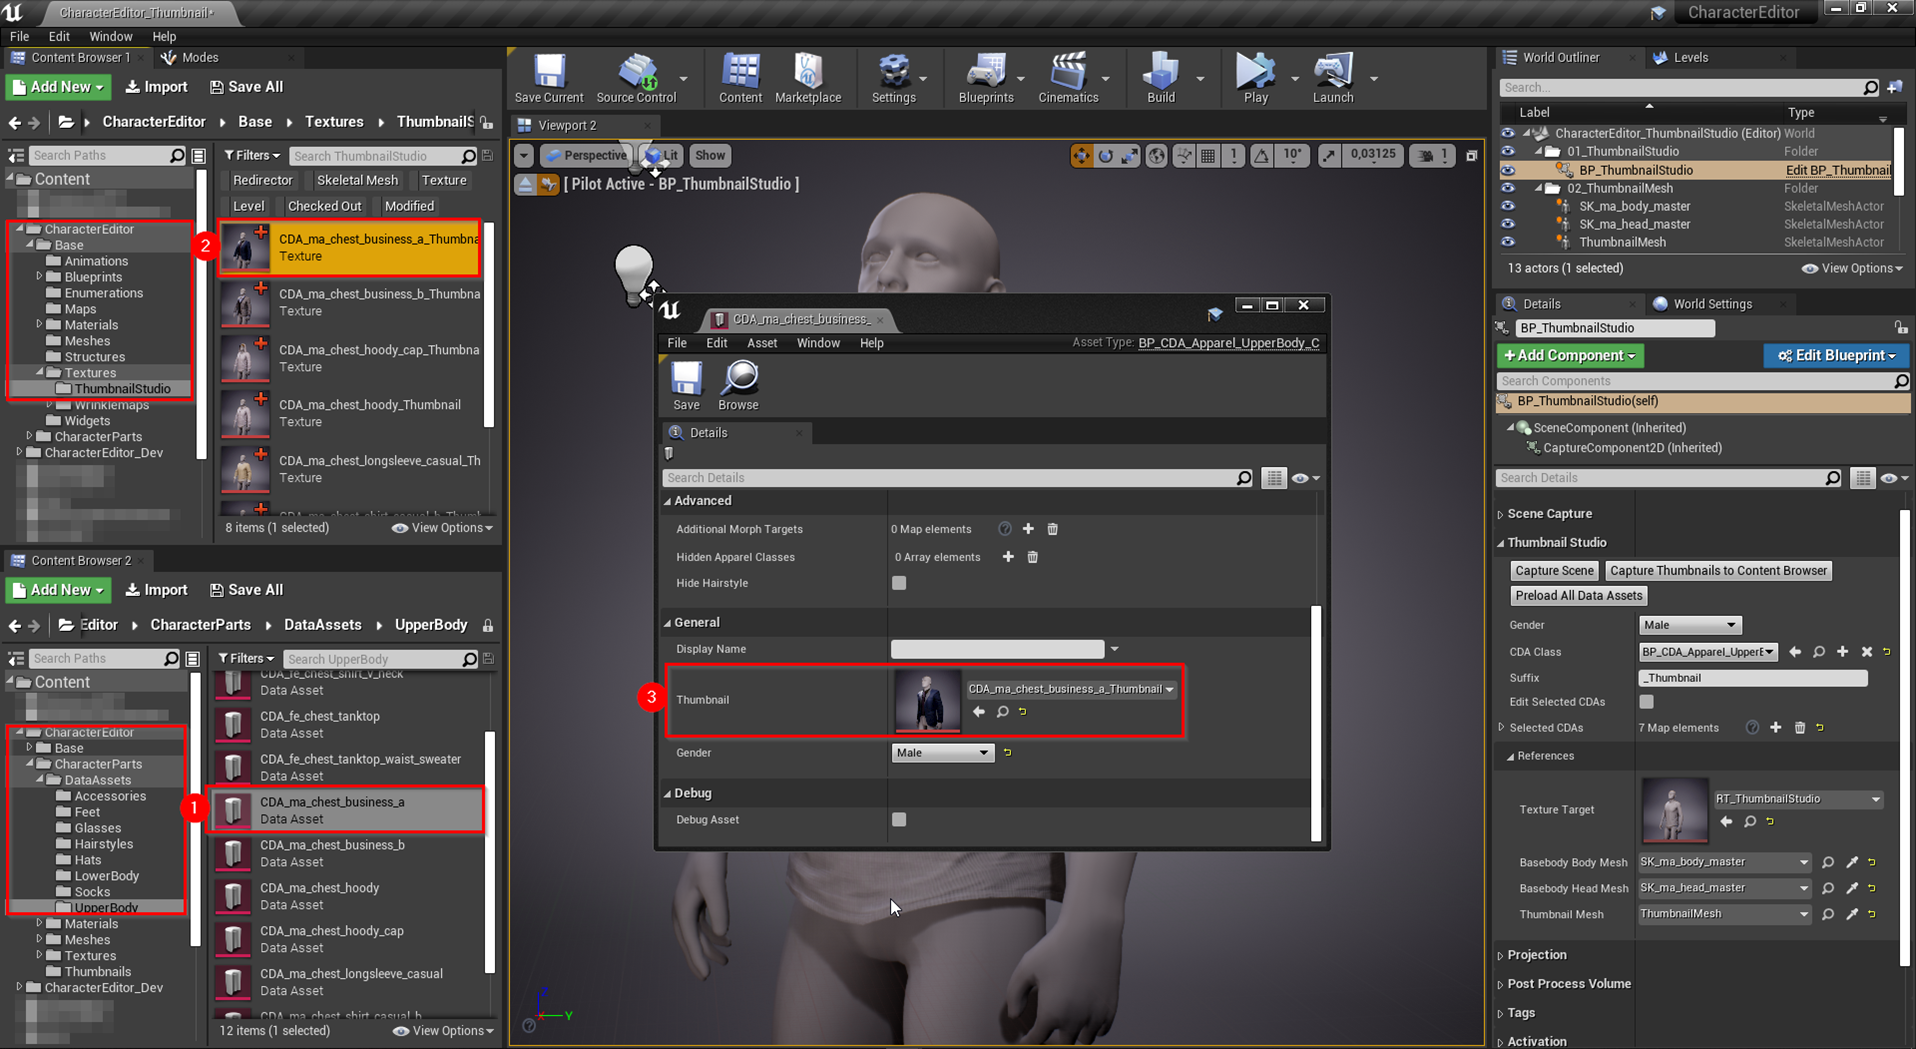
Once happy with the textures, save and assign them as Thumbnail in their respective data asset.
You can open another Content Browser from Window > Content Browser > Content Browser 2, which is recommended since in one of them you open the data asset folder (1) and in the other you open the texture folder (2). Then open the data asset and assign the texture.

-
Repeat the process for all other thumbnails as you like.