As teased in BP_LightStudio you can create custom presets very easily and do not need to worry about the relative locations and rotations.
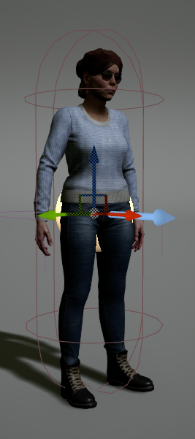
Simply place the Blueprint in the scene like seen on the right. It is not necessary to perfectly align it with the character but would be a good starting point.

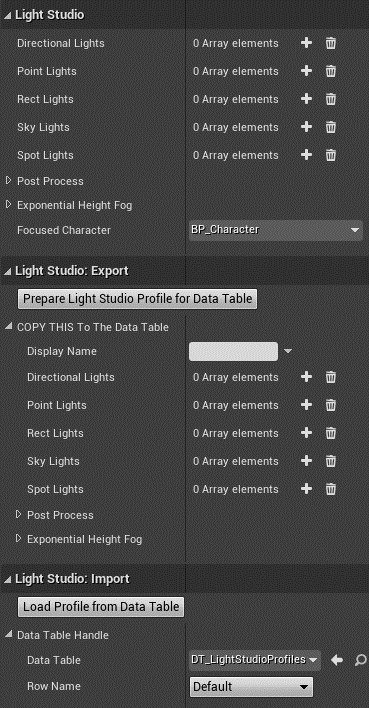
Once placed, you can add any number of lights you want to the arrays in the Details Panel “Light Studio” section. As described in the main chapter, all lights and the Exponential Height Fog consist of all possible Blueprint properties. The Post Process contains an actual post process structure. Feel free to adjust as you like.
For each light entry a light component is spawned. Place it as you like and do not worry about the placement of the BP_LightStudio actor. We fix it later anyway.
If you are done with your setup or like to save an intermediate result, simply select the character near the BP_LightStudio as your “Focused Character” and head to the “Light Studio: Export” section. Click on “Prepare Light Studio Profile for Data Table” button. This will “fix” the BP_LightStudio location and rotation by placing and rotating it in alignment to the Focused Character, while transforming all your lights’ relative locations and rotations to preserve your placements.
If your viewport does not update in Realtime, it should be necessary to deselect the BP_LightStudio and re-select it to see visual updates for newly added lights or the button fix.
Now copy the “COPY THIS To The Data Table” structure by right clicking it. Then open DT_LightStudioProfiles, create a new table row, paste the copied profile into the row – again by right clicking it – and eventually giving it a Display Name in that row. Save your data table.
Now either play the game to test your new profile or modify it further. Of course your are also able to tweak all settings in the data table, but then you do not have the visual preview of the editor viewport.
If you stop working and come back later you can also head to the “Light Studio: Import” section to load one of the data table rows into the selected BP_LightStudio. The Data Table Handle > Data Table is already selected. You just need to select the Row Name of your choice and press the “Load Profile from Data Table” button. Have fun!