¶ Introduction
As described in Customization Data Assets you can create custom CDAs and even CDA classes. Since WBP_CharacterEditor is only showcase, currently, there are only the following three CDA pickers.
If you need one for equipment and/or attachments, you have to copy one of them and their child widgets.
¶ How to: Create new CDA class
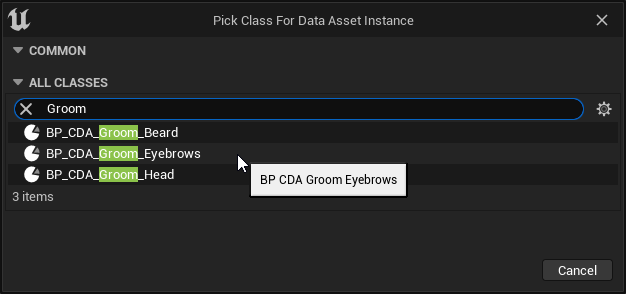
This tutorial shows you how to create BP_CDA_Groom_Eyebrows based on BP_CDA_Groom.
The main idea is to create a child Blueprint class based on your desired CDA type (Apparel, Attachments, Equipment, Groom, Hairstyle). Afterwards copy one of the available CDA pickers to use the new class.
-
Create Child Blueprint Class base

-
Rename the new class as desired

-
Open
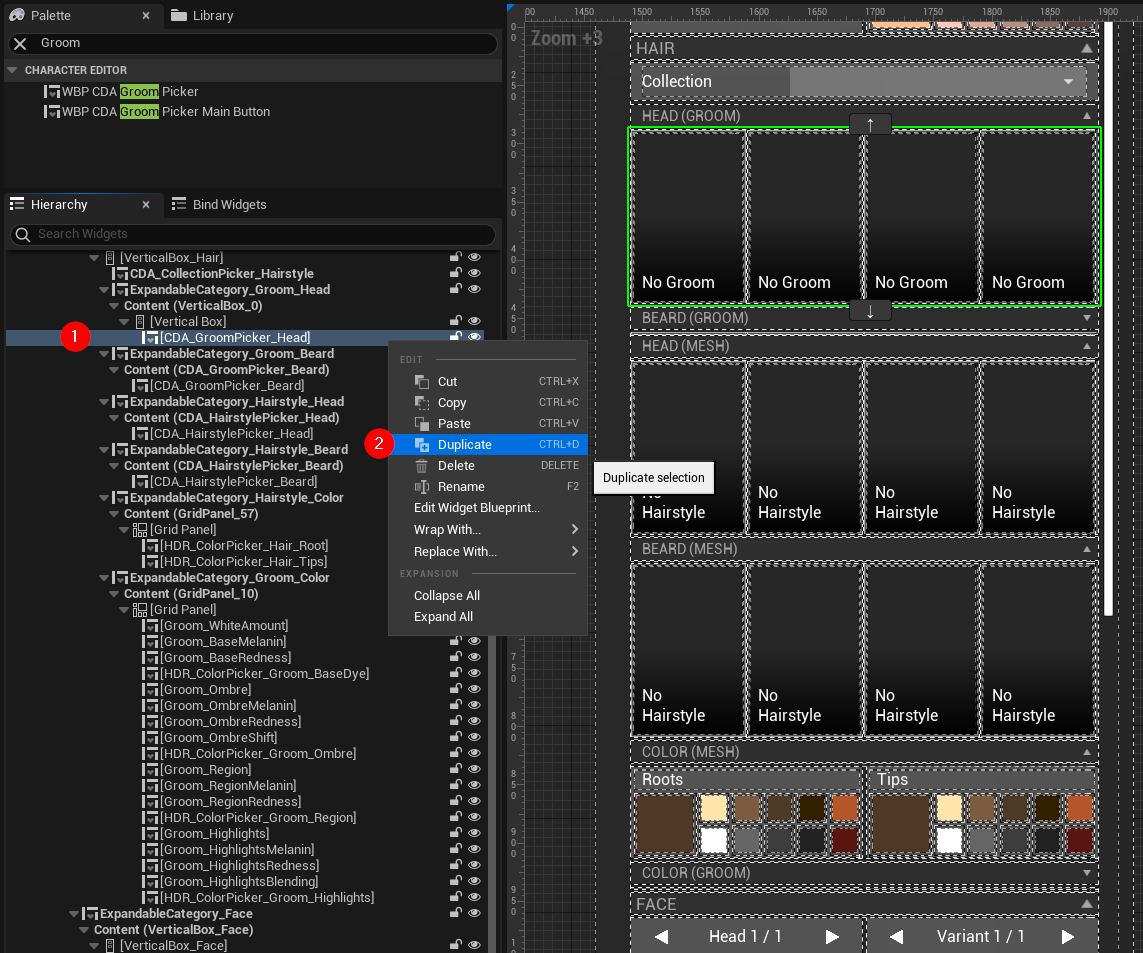
WBP_CharacterEditor. For this example, we want to add the new eyebrows picker just below the head picker. (1) Right clickCDA_GroomPicker_Headand (2) wrap it with a Vertical Box.

-
(1) Right click
CDA_GroomPicker_Headand (2) duplicate it.
-
See it appear on the right side below the head picker. Rename the picker as desired.

-
(1) Select the new picker and in its details panel, (2) change its top padding for a little gap to the other picker and most important (3) change its Groom Picker > Class to your new class
BP_CDA_Groom_Eyebrows.

-
Now you can select CDAs based on your new class.
See How to: Add CDAs below for details.
¶ How to: Add custom logic for CDA classes
If you want to implement custom logic, when assigning CDAs, take a look at BP_Character > ApplyApparelSpecificSettings on how to handle your new data asset specifically.
Previous to V9 Utility Update it was found in BP_CharacterCustomization > (7) UpdateApparel
¶ How to: Add CDAs
This tutorial shows you how to add new CDAs based on the BP_CDA_Groom_Eyebrows class created above. Of course, you can do this for all CDA types (Apparel, Attachments, Equipment, Groom, Hairstyle).
Our CDAs are located under /CharacterEditor/CharacterParts[_PackageName]/DataAssets/ or /CharacterEditor/CharacterParts[_PackageName]/DataAssets_Metahuman/ grouped by their type, thus we recommend you to create a similar folder structure outside of our packages in case you want to upgrade the Character Editor to future releases.
-
If you create the very first CDA, use
Content Browser > Add New > Miscellaneous > Data Assetand select the desired class in the class picker window. If you create subsequent CDAs you can also duplicate the asset in the Content Browser.
-
Open the new data asset and start editing. For the Groom eyebrows, add (1) a Groom Asset, (2) the corresponding Binding Asset, (3) a display name, and (4) a thumbnail.

Depending on the class you have chosen on creation you might see different properties as described in Customization Data Assets. See this chapter for details on all the properties. See also Tutorial: Capture CDA Thumbnails for details on thumbnails. For the tutorial purpose, we chose a simple texture as a thumbnail.
- Start the game, (1) find your new CDA in a the corresponding picker and (2) select it to see it on your character.
