The following information is for Development Builds and Shipping Builds!
In this tutorial we will show how to package our example showcase map from a blank project’s perspective on the Windows platform. Afterwards you will be able to start a Dedicated Server and connect multiple clients via a console command.
¶ Requirements
You need a UE4.27 source-built engine!
If you are new to this, you should follow this Unreal Engine tutorial. Our Character Editor runs on the source built UE4.27 engine on Visual Studio 2019. Make sure to use the correct branch on Git.
If you are familiar with packaging Dedicated Servers and clients you can use your own project respectively.
Afterwards follow these steps:
¶ Visual Studio
- Start the source-built engine.
- Create a new C++ project.
- Add a [PROJECTNAME]Server.Target.cs” with the following content to the project. Replace [PROJECTNAME] in both the file name and the file content.
// Fill out your copyright notice in the Description page of Project Settings. using UnrealBuildTool; using System.Collections.Generic; public class [PROJECTNAME]ServerTarget : TargetRules { public [PROJECTNAME]ServerTarget(TargetInfo Target) : base(Target) { Type = TargetType.Server; // This is important DefaultBuildSettings = BuildSettingsVersion.V2; ExtraModuleNames.AddRange( new string[] { "[PROJECTNAME]" } ); } } - Compile the project with project configuration “Development Server”. It may take a while.
When successful, you can package the dedicated server from within the Unreal Editor. - Compile the project with project configuration “Development Editor”. It may take a while.
When successful, you can open the project in the Unreal Editor. - Open the project by double-clicking on your project’s UPROJECT file. The Unreal Editor opens.

¶ Unreal Editor
- Go to Project Settings > Packaging.
- Search for “List of maps to include in a packaged build”.
- Add “/Game/CharacterEditor/Base/Maps/CharacterEditor_Showcase_Replication” and “/Game/CharacterEditor/Base/Maps/CharacterEditor_Showcase_Replication_EntryMap” to the list. Both are needed for the client. The first one only for the server.

- CharacterEditor_Showcase_Replication has BP_CharacterEditorGameMode assigned.
- CharacterEditor_Showcase_Replication_EntryMap has GameModeBase as its game mode.
- Search for “Additional Asset Directories to Cook” and add your CDA directories, like you did in tutorial Package Project for Singleplayer.
- Go to Project Settings > Maps & Modes.
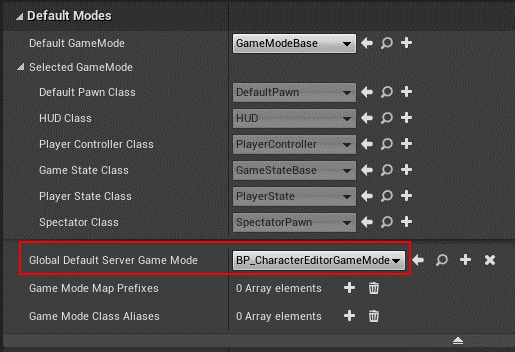
- Open Default Modes > Advanced Settings.
- Add
BP_CharacterEditorGameModeas “Global Default Server Game Mode”.
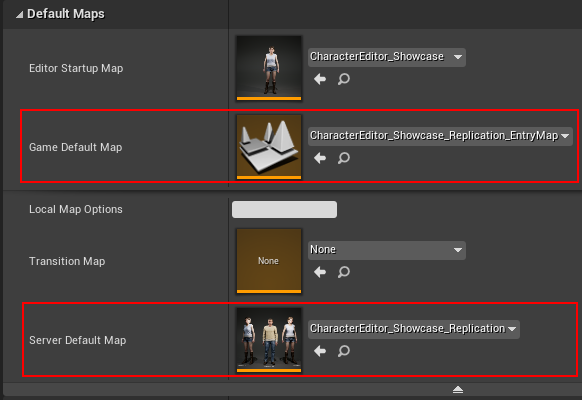
- Open Default Maps > Advanced Settings.
- Select
CharacterEditor_Showcase_Replication_EntryMapas “Game Default Map” and
CharacterEditor_Showcase_Replication as “Server Default Map”.
The Entry Map is empty and will only be used for entering the mentioned console command to connect to the dedicated server.
¶ Packaging the Dedicated Server
-
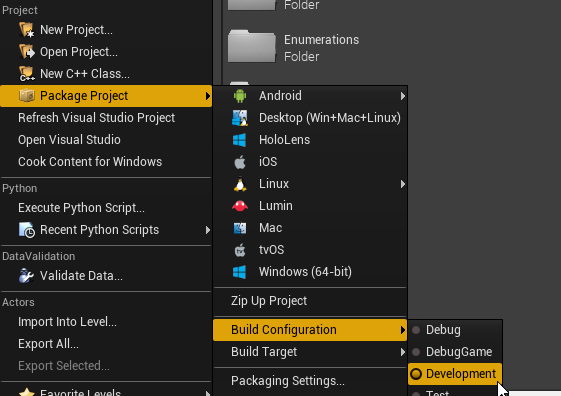
Go to File > Package Project.
-
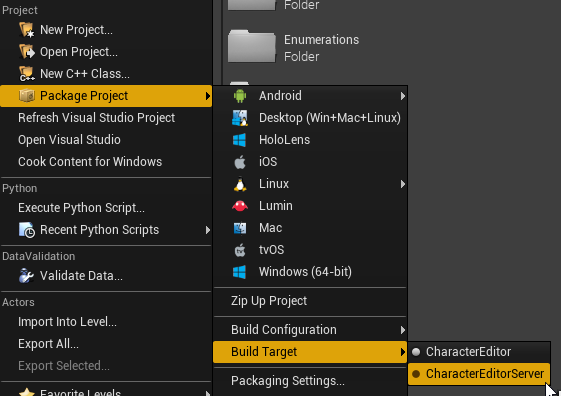
Set Build Configuration to “Development” and Build Target to “[PROJECTNAME]Server”.
-
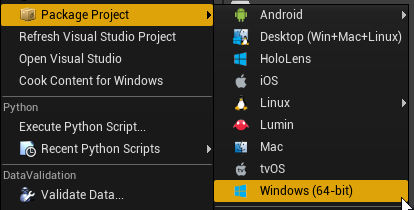
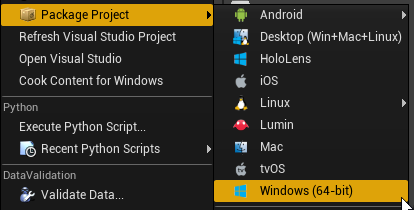
Select File > Package Project > Windows (64-bit) and choose a target directory.
The packaging may take a while. When successful, go to next step.
¶ Packaging the client
-
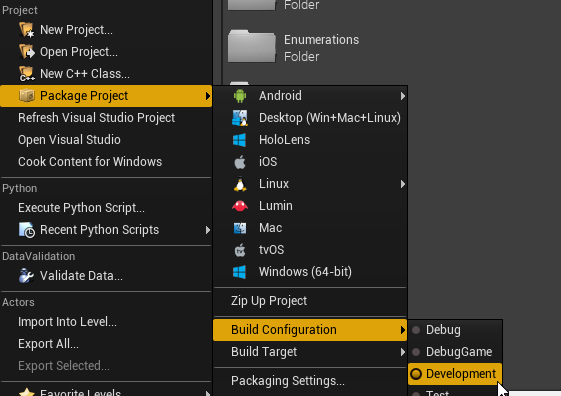
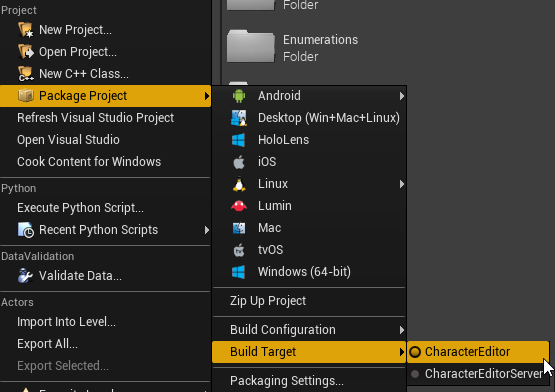
Set Build Configuration to “Development” and Build Target to “[PROJECTNAME]”.
-
Select File > Package Project > Windows (64-bit) again and choose a target directory.
The packaging may take a while. When successful, go to next step.
¶ Validating the packages
- You should now have these to directories if you chouse the same location for both packages. WindowsNoEditor contains your client package and WindowsServer your Dedicated Server.

¶ Starting the Dedicated Server
- Open directory “WindowsServer”.
- Create a shortcut to your [PROJECTNAME]Server.exe file from the context menu.

- Open its properties and add a “ -log” right at the end of the target to open a log window when starting the Dedicated Server.
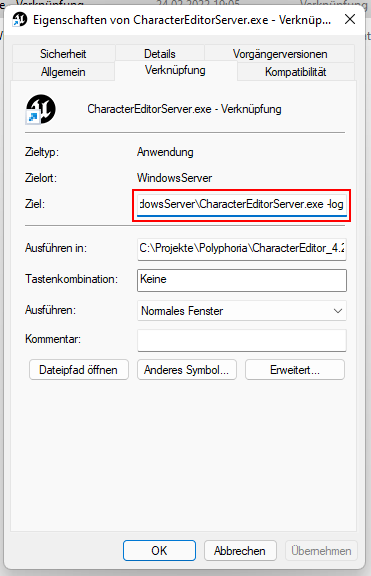
- Start the Dedicated Server by double-clicking on the shortcut.
- See the log and verify that the correct map and game mode are loaded.

¶ Starting the client(s)
-
Open directory “WindowsNoEditor”.
-
Start the client by double-clicking on “[PROJECTNAME].exe”.
-
You will see a black screen as this is the empty entry map we assigned before.
-
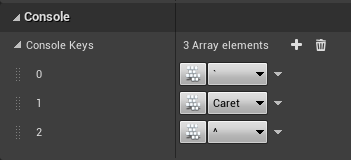
Open the console by pressing ~ or ^ key directly below your Escape key, depending on your keyboard.

If this does not work, you need to add a custom key to Project Settings > Input and repackage the client. This time the packaging should be much faster.
-
If the console is shown, type in “open 127.0.0.1”. This will connect you to the Dedicated Server running on your localhost (127.0.0.1) and loads the map hosted by the server.

If the client stays black and nothing happens, this is most likely because the Dedicated Server went to sleep mode. Just tab out of your client, focus the Dedicated Server log and press Enter. The log should now print some content. Head back to your client and see it loading into the map.
- The client will load all the Customization Data Assets to be ready to use in the in-game editor.
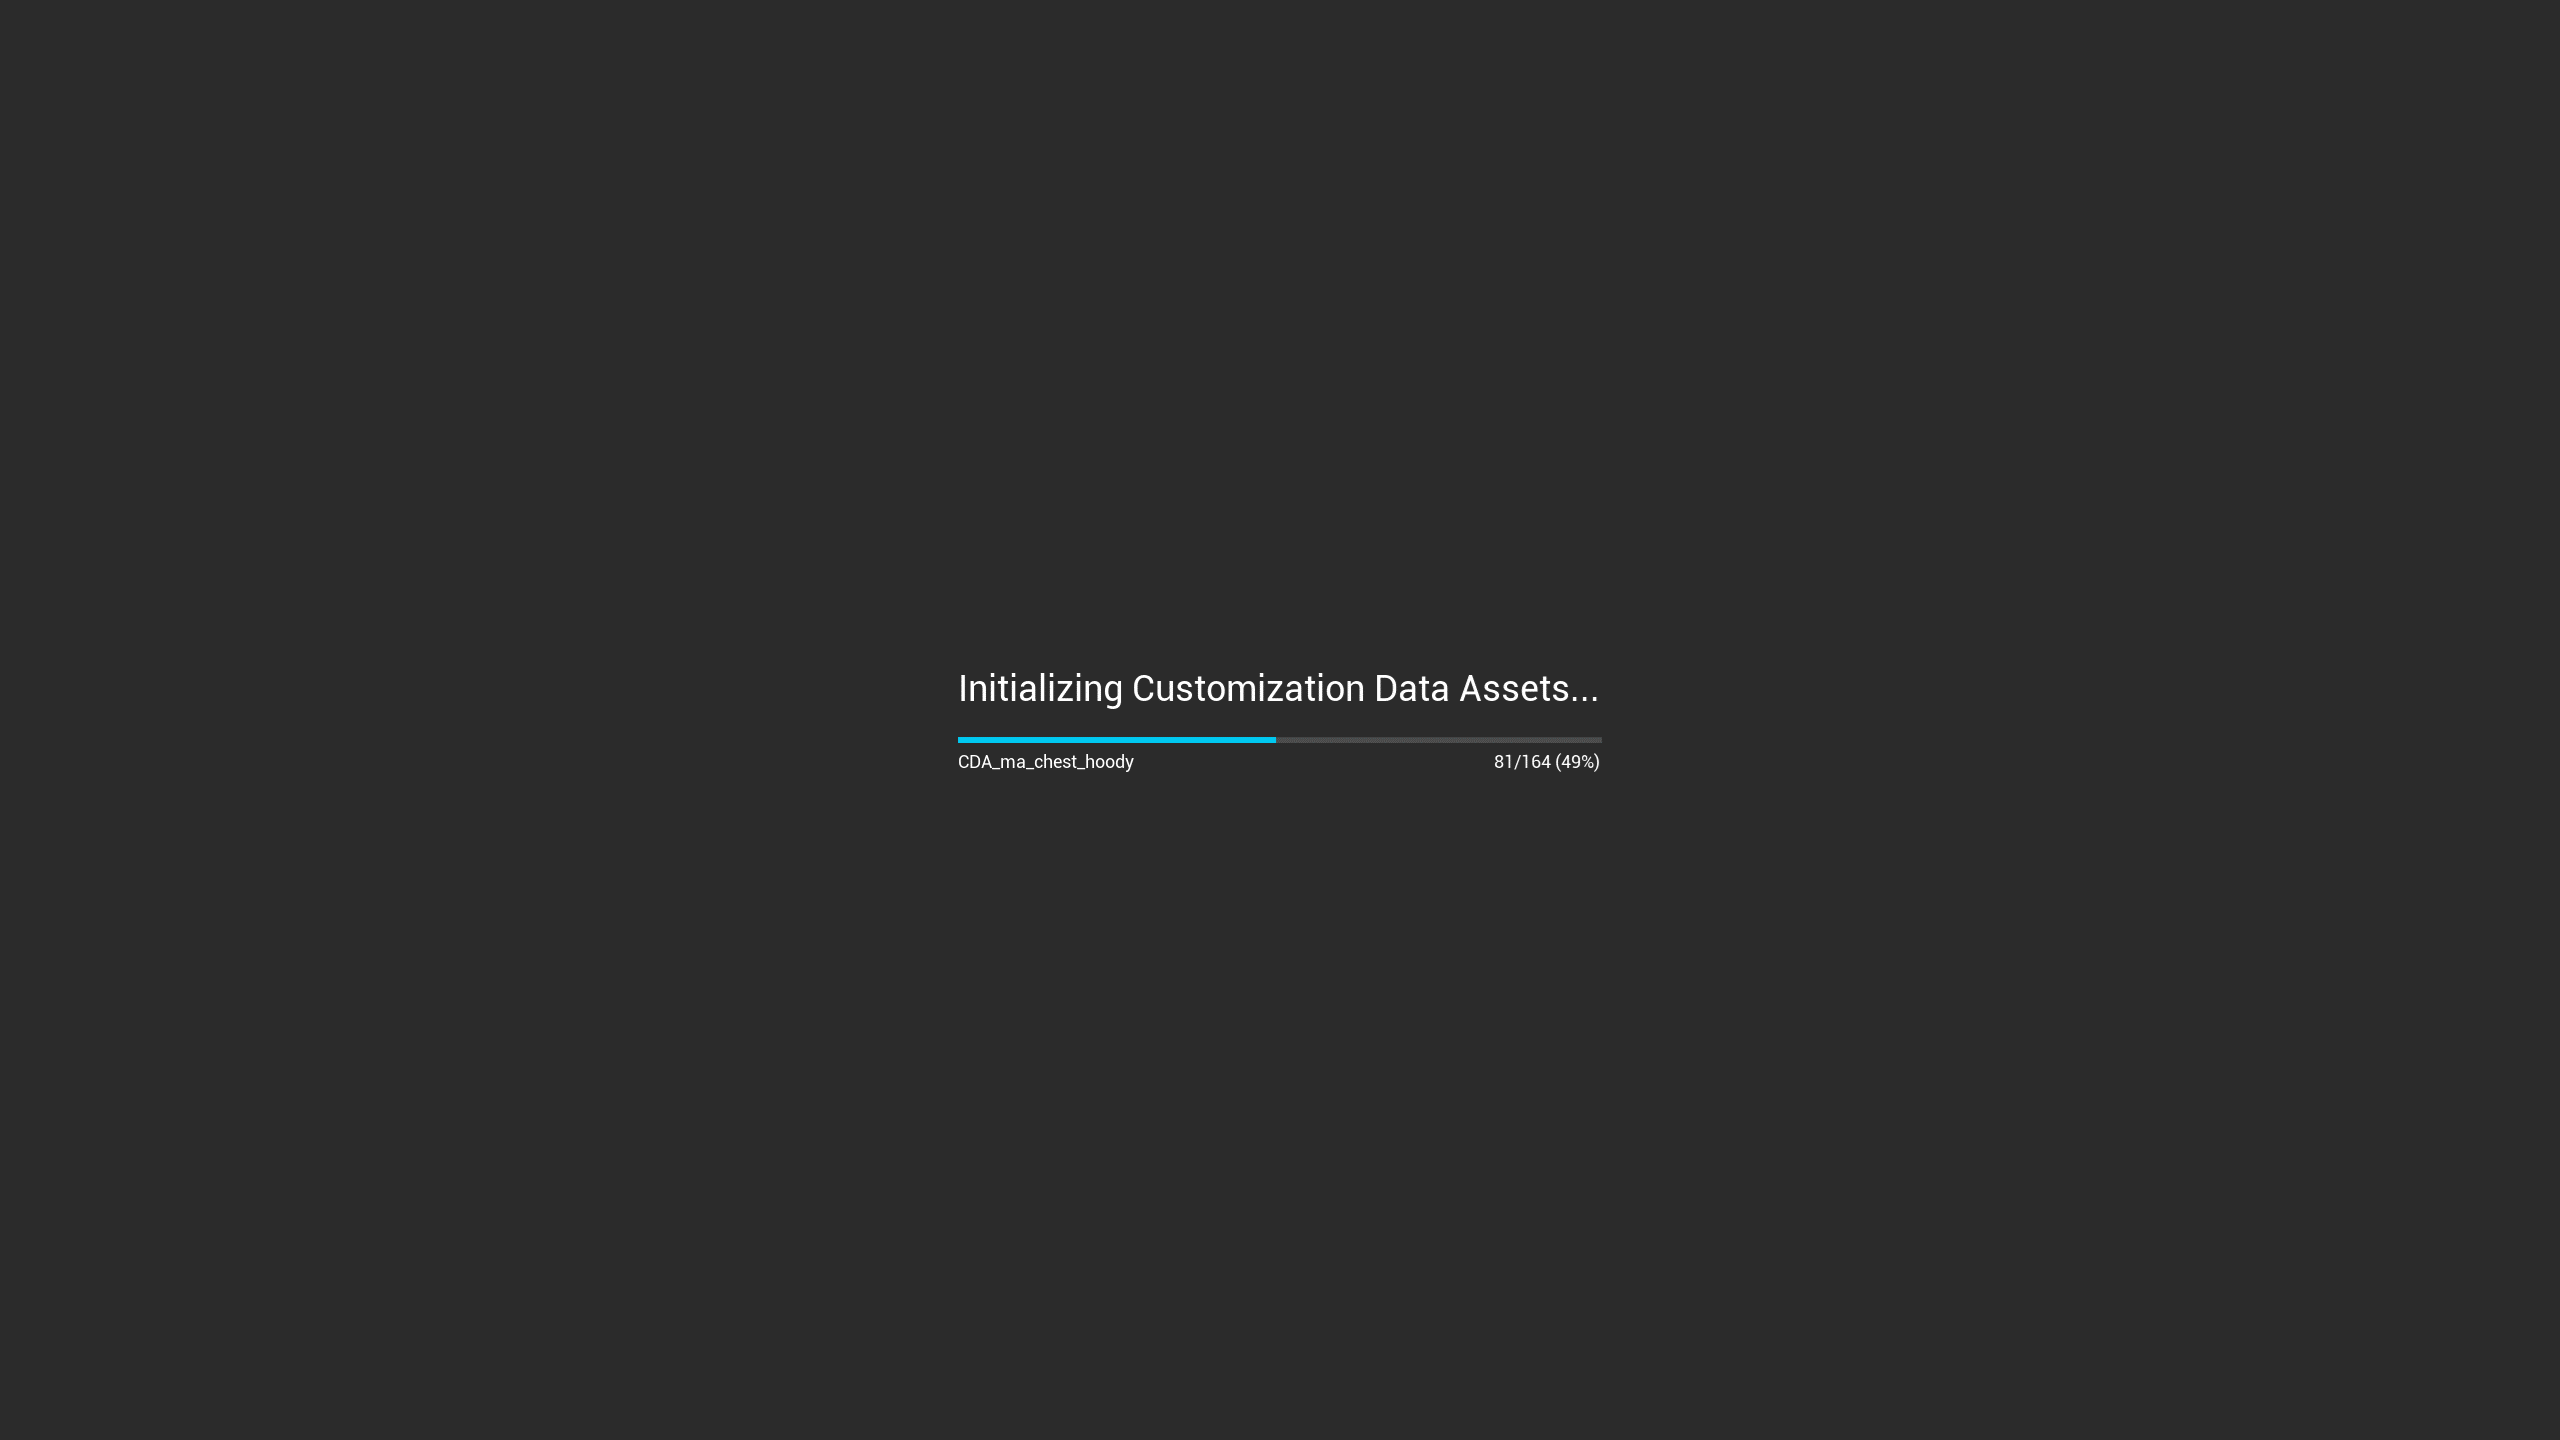
You may notice a short delay before the loading screen appears, because it was initially only meant for loading inside of the instant PIE in Unreal Editor to unfreeze the engine and give you, as a developer, feedback of what is happening. It was not meant for loading right after the startup of packaged game as games usually do not start directly with a Character Editor, but with intro movies, general loading screens etc.
We did not want to restrict you to our loading screen, so you may want to come up with your own solution. Look at
WBP_CDA_Loaderfor details. The loading is easily made. If any questions arise, do not hesitate to contact us.
-
When the loading is done, you can use the Character Editor after another short delay, that is mentioned in chapter BP_CharacterCustomization component.
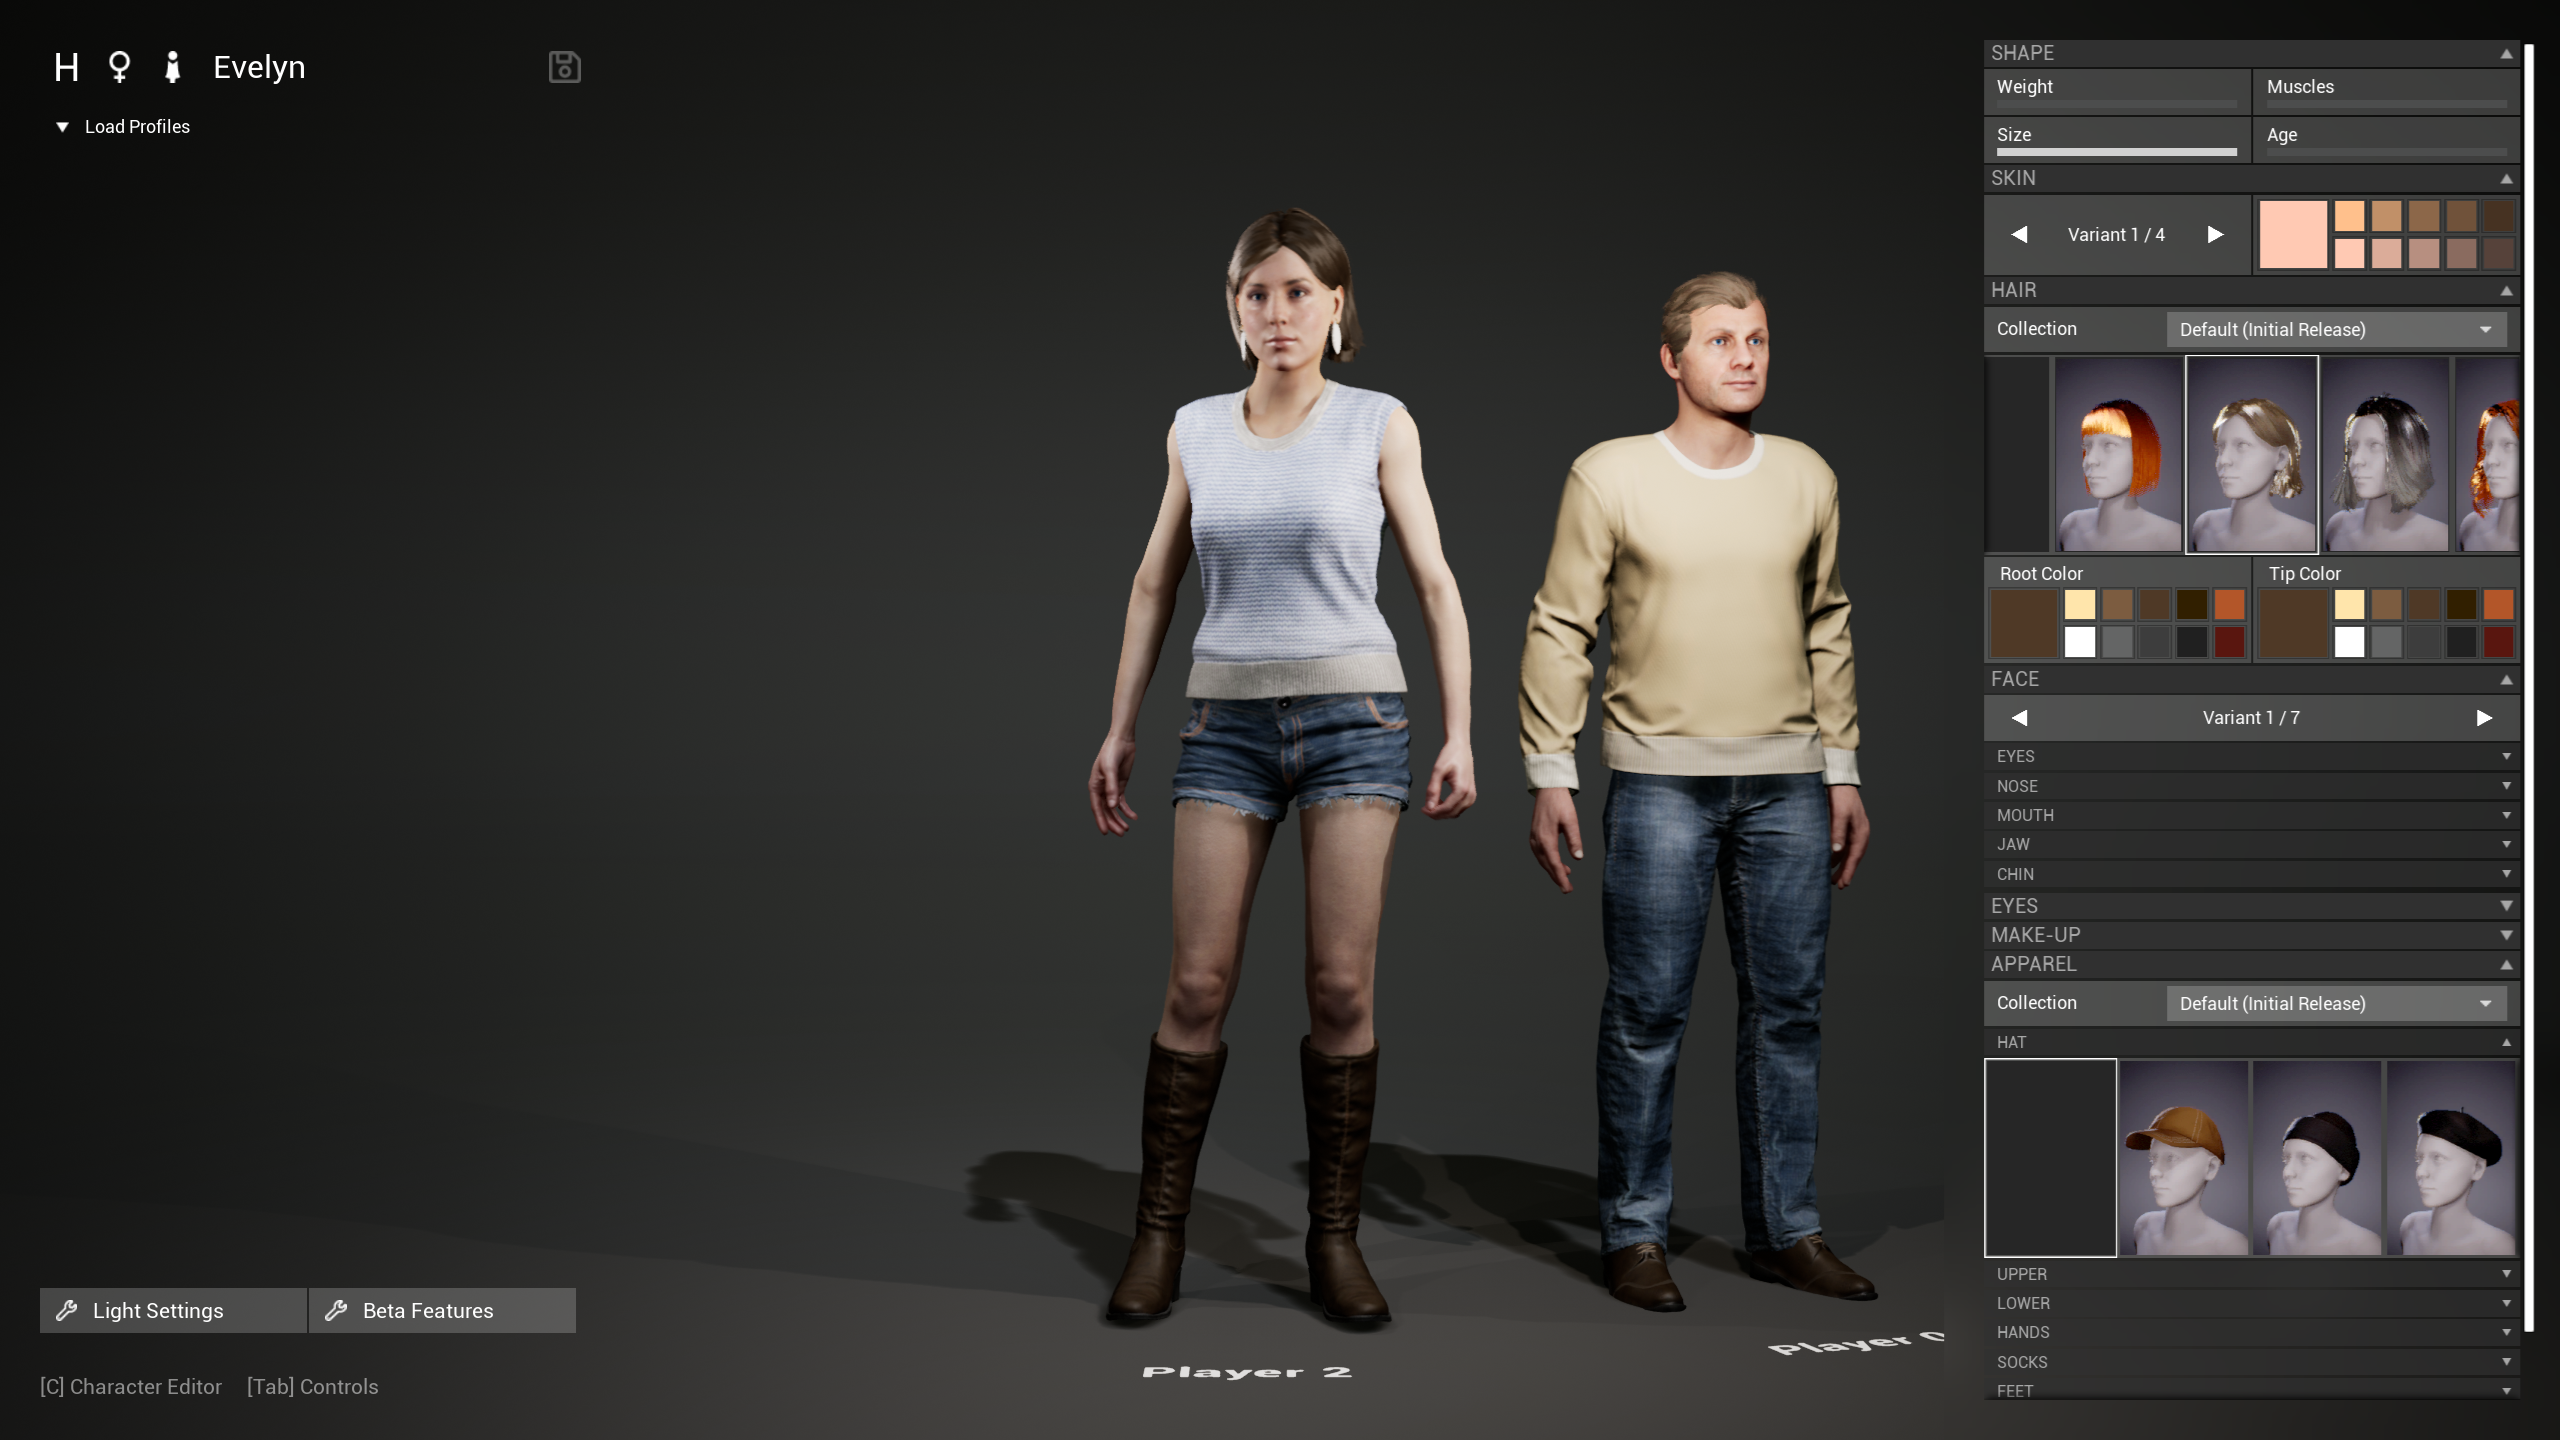
-
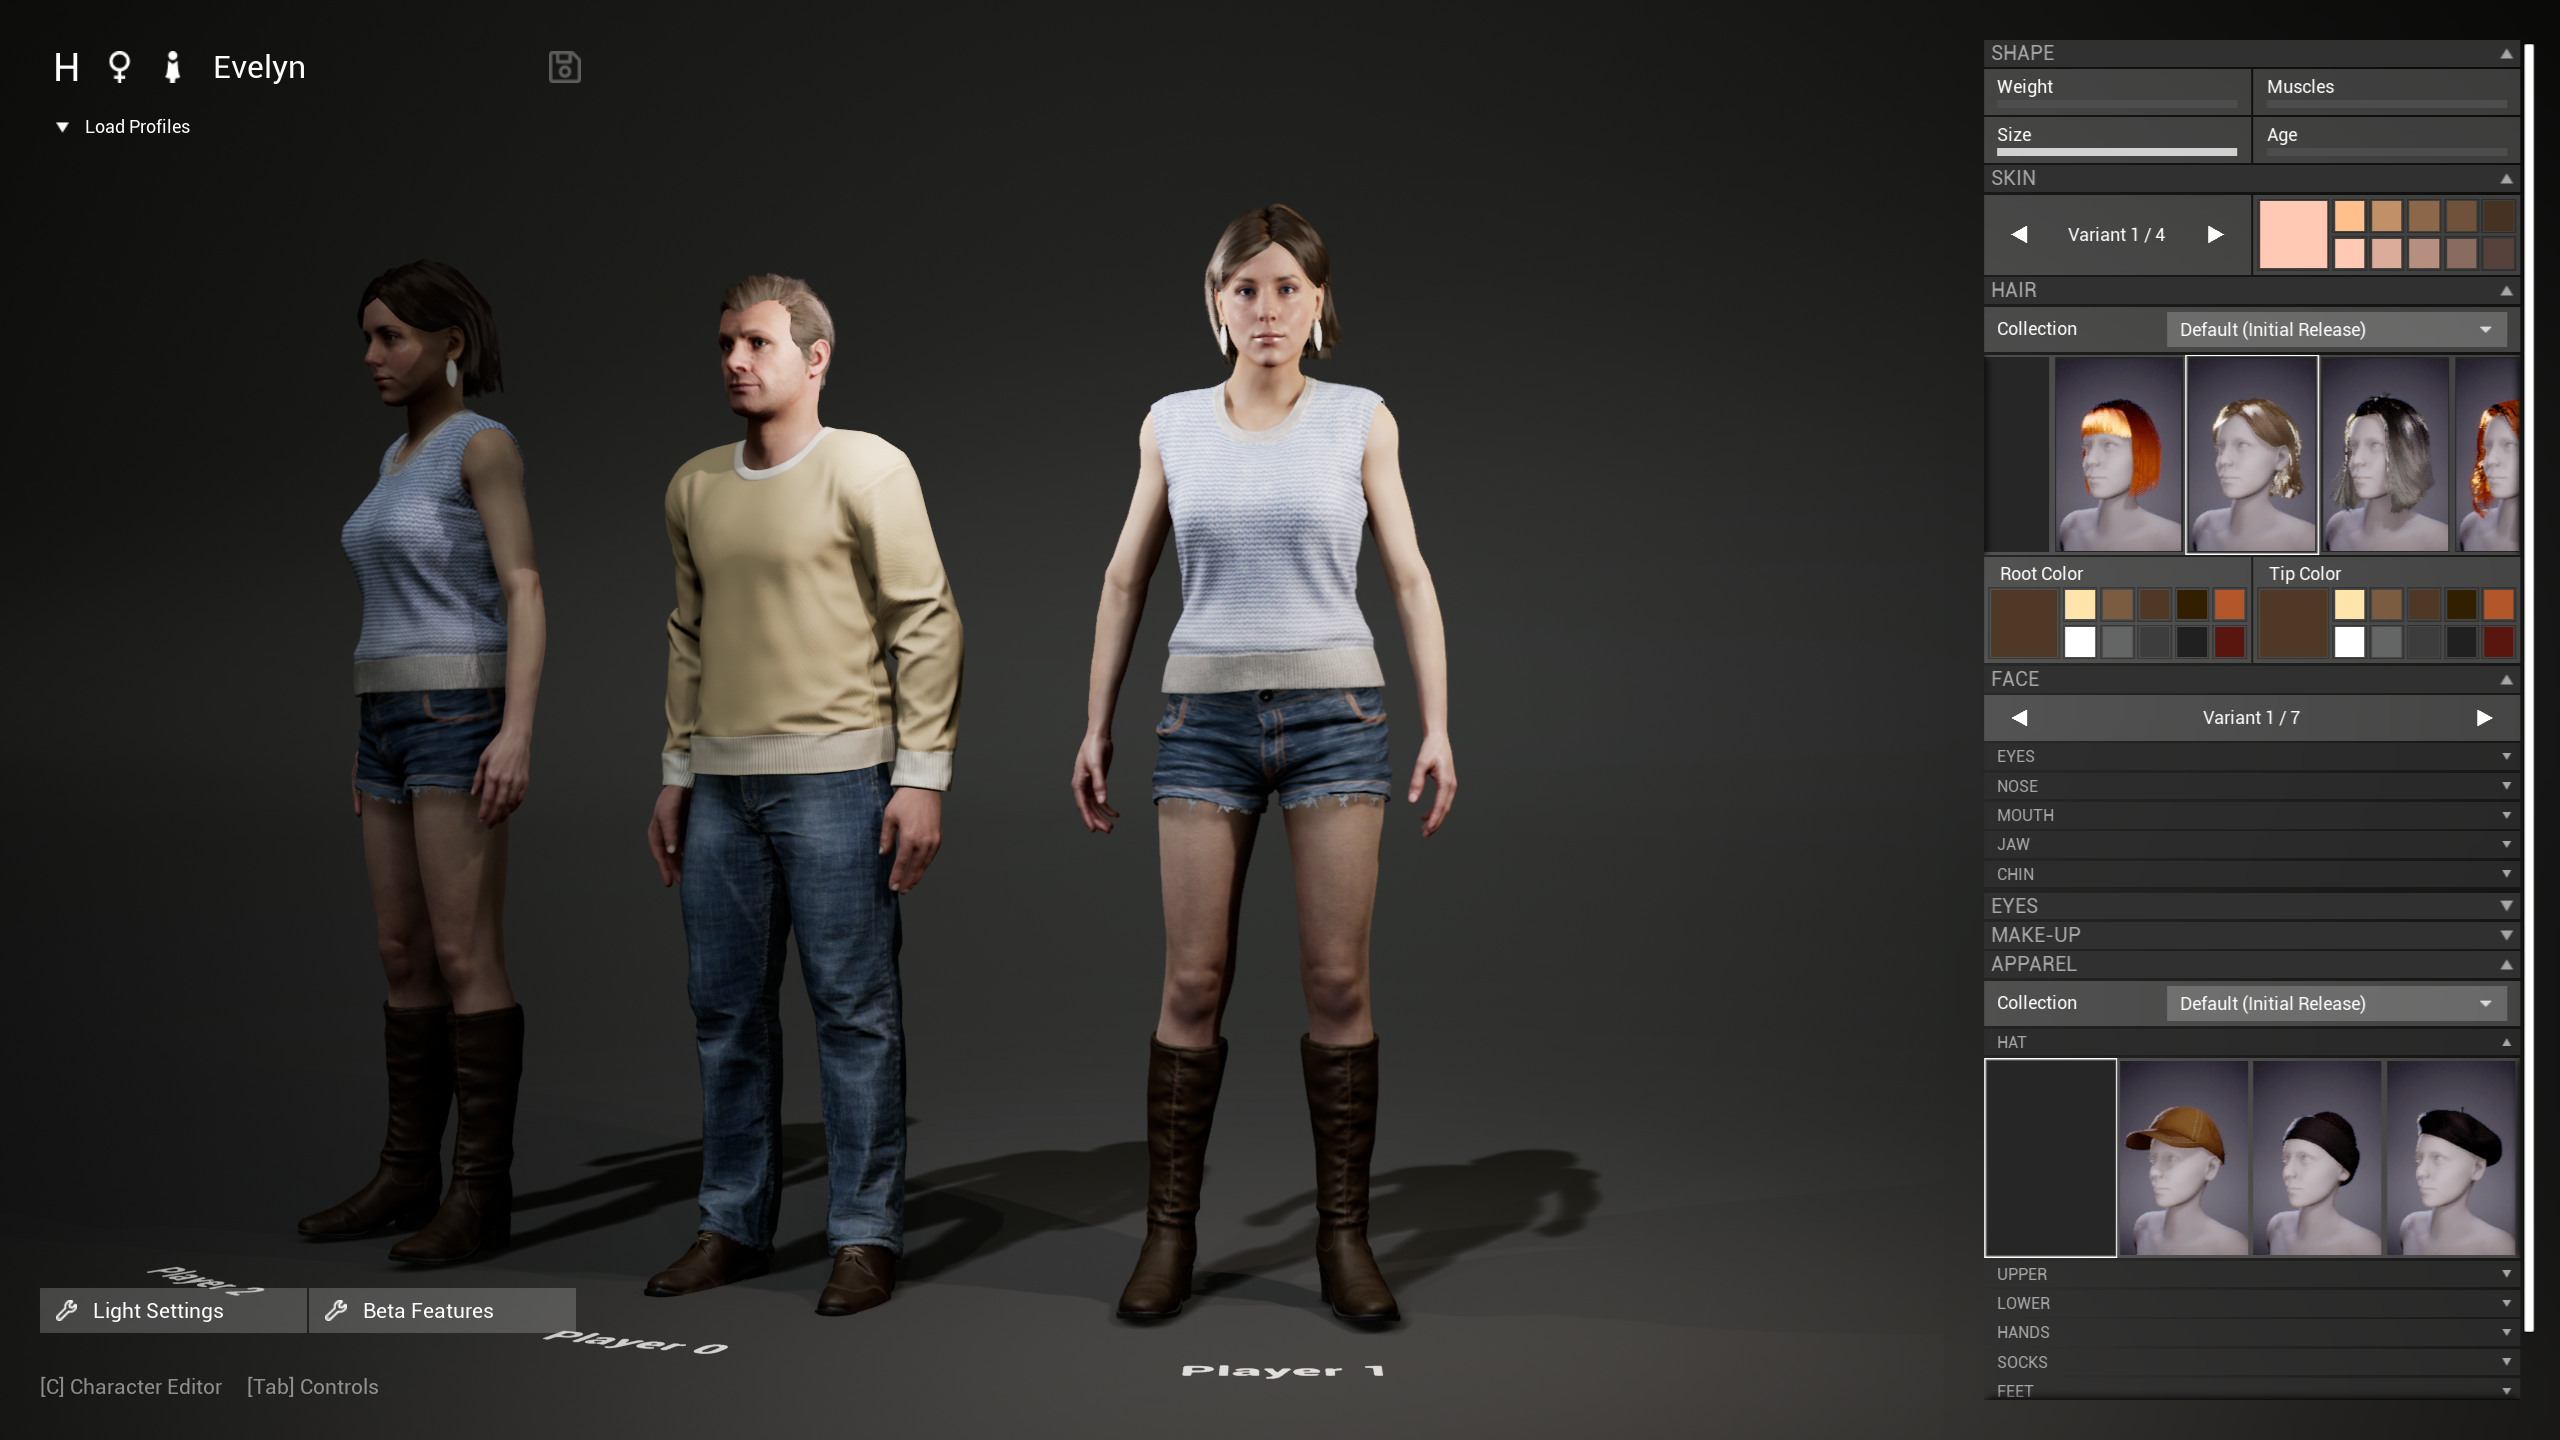
Repeat step 27 to 33 to start another client. Once it is loaded the other player start will be occupied.
-
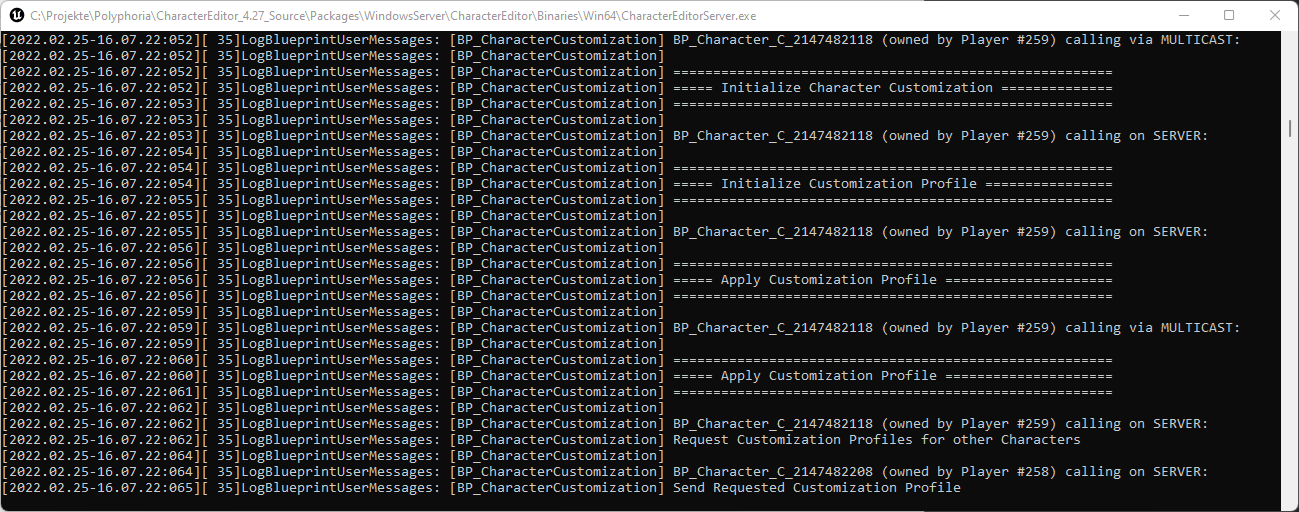
You can now use both client Character Editors. See the Dedicated Server log for default output that is controlled by the Output Mode property explained in chapter Debug Mode & Logging.


¶ FAQ / Common Issues
¶ Missing CDAs on multiplayer clients and potential crashes during in-engine testing with turned off Editor Preference “Run Under One Process” (including workaround)
This issue is nothing truly breaking as it does not affect default testing strategy and packaged games, as you can see in our replication tutorial Package the Project for Multiplayer. But if you want to use that Unreal feature, maybe YOU 😉 can help us with fixing this issue.
¶ Issue (workaround below)
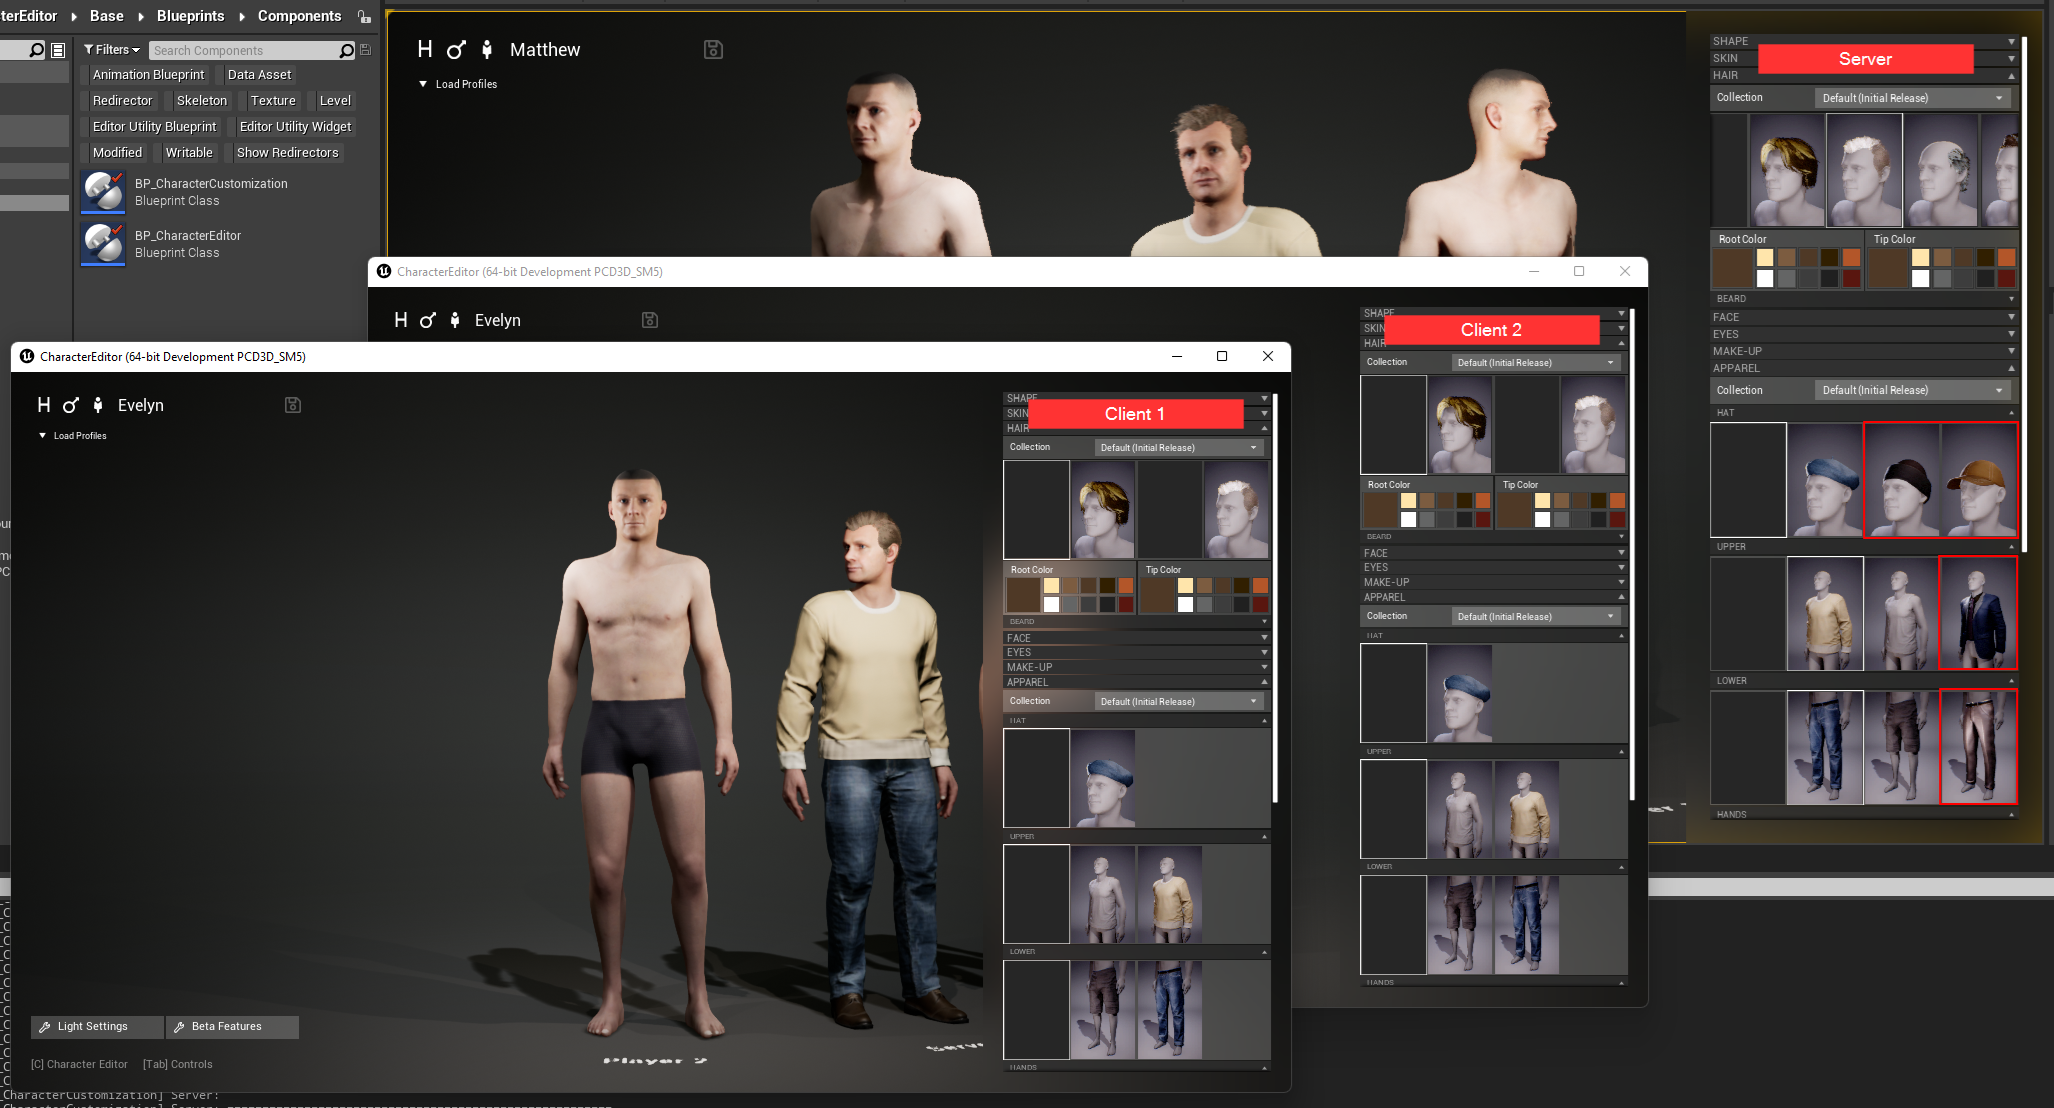
Back to the issue, if you test your Multiplayer game in engine with the Editor Preference “Run Under One Process” turned off, you probably will face the problem, that clients only have Customization Data Assets available that are available to the current Preset Data Table, assigned in BP_Character. For some reason, with this preference, multiplayer clients cannot use the loading logic of WBP_CDA_Loader as these clients run on their own process and seem to not have access to the Content Browser assets, which our CDAs are.

You can see the result below:
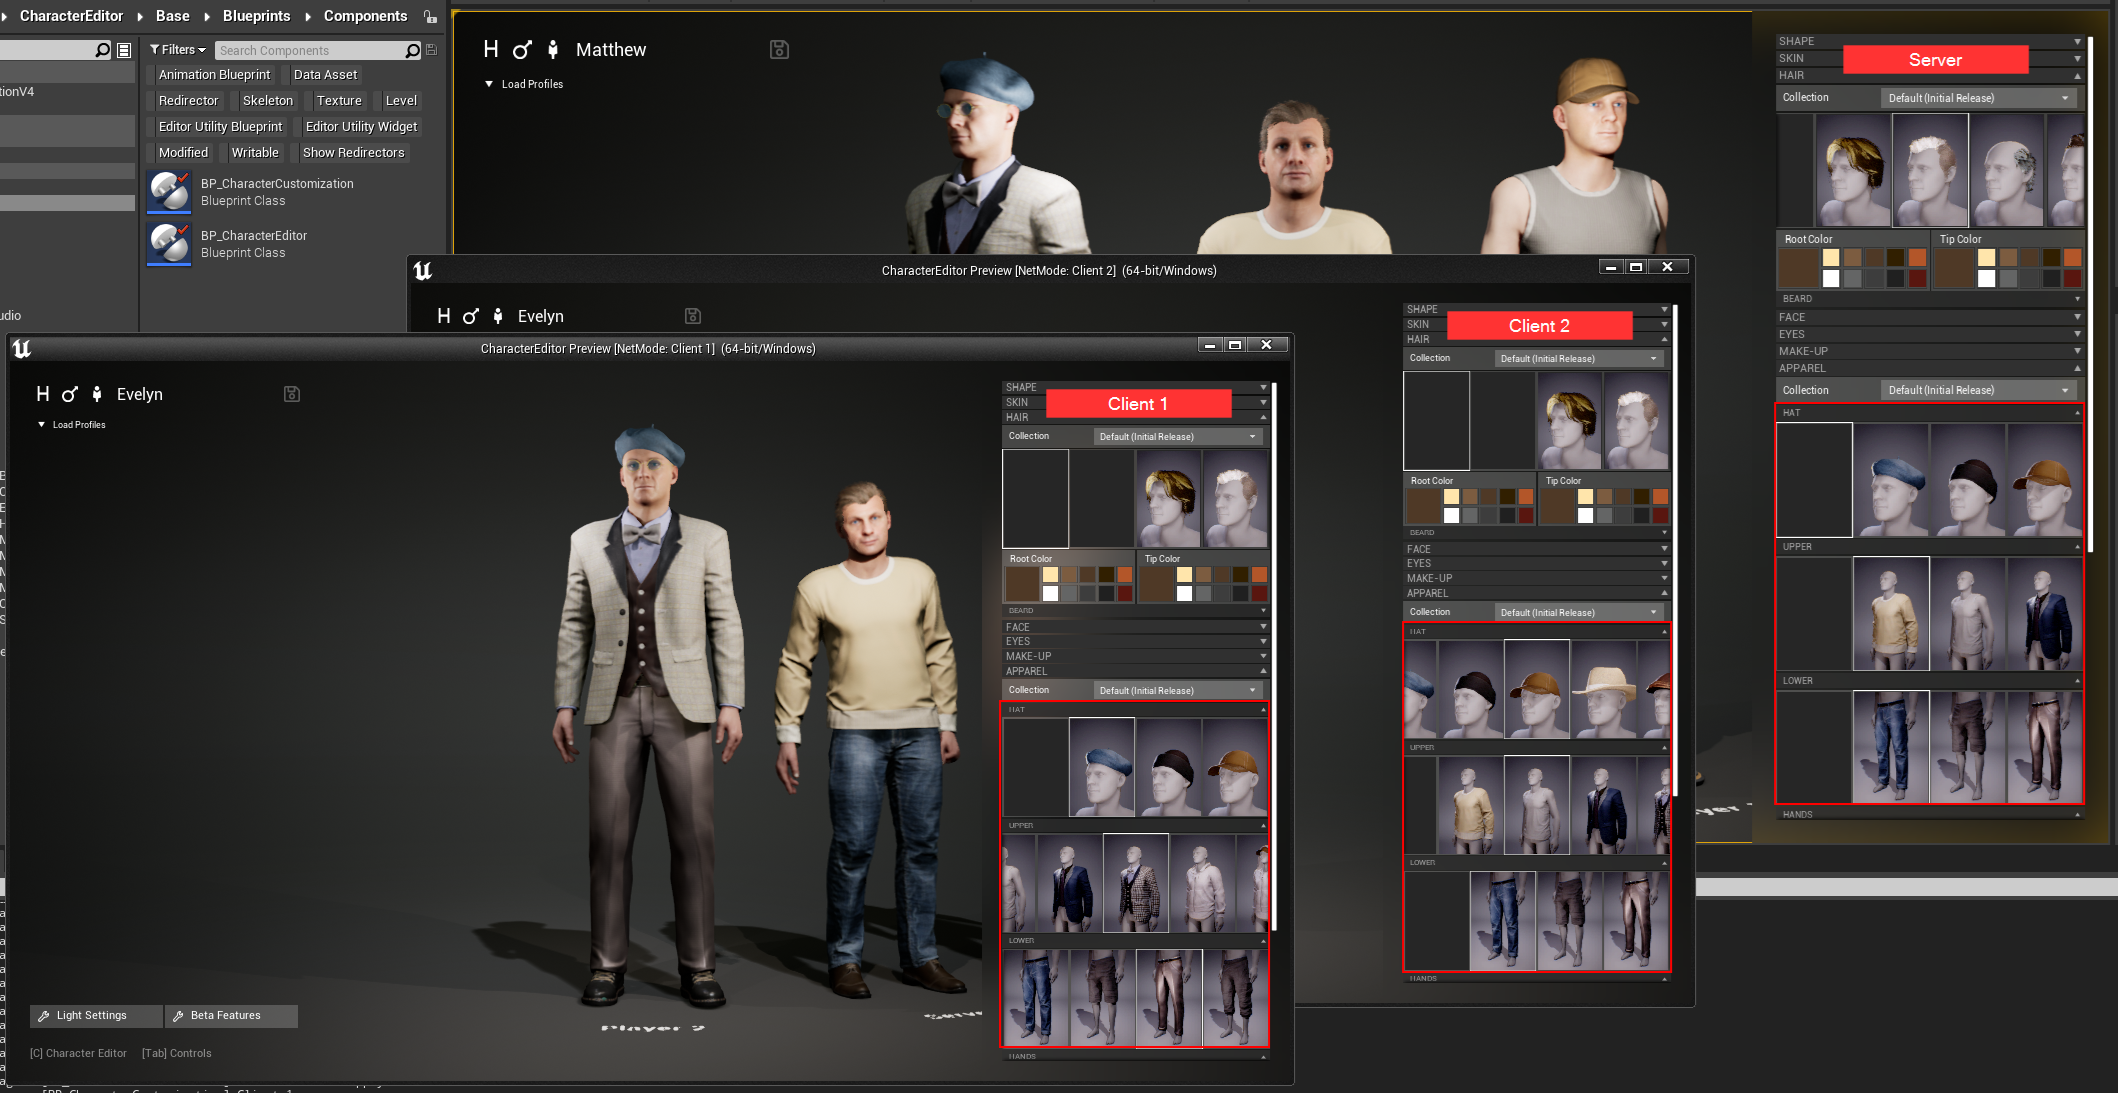
The two clients have less CDAs displayed, the listen server on the other hand can use all CDAs normally.
Changing the CDAs on a client, will also sometimes cause a crash of that client, because of mismatching information about the selected CDA between server and client.
¶ Workaround
If we cannot fix the issue, please use the default testing strategy by turning on Editor Preference “Run Under One Process” again if you want to test the Character Editor in multiplayer and in engine. For standalone testing we currently just recommend packaging the game.

Though, a tooltip mentions that turning this on has potential to have more issues, but in our case, it is the other way around as you have seen above. As you can see below, with this setting the CDAs all load properly, because they are delivered by the main process, the engine is running on.
